The True Cost of Aging in Place: 2025 Edition
Quick Answer Box
Aging in place involves modifying the home to support safe and comfortable living as mobility decreases with age. Homeowners manage basic updates independently, but major changes demand licensed professionals. Budget between $15,000 and $70,000 based on home size and existing conditions. Projects span several weeks to months. Key risks arise from electrical, plumbing, and structural alterations, all of which require compliance with building codes.
Step-by-Step Instructions
1. Assess Your Home
Conduct a thorough walkthrough to pinpoint accessibility barriers. Measure door widths, evaluate floor transitions, assess lighting adequacy, and inspect bathroom hazards such as slippery surfaces or high tubs.
Success Check: Compile a detailed written list of issues, including precise measurements for each area.
2. Create a Budget and Plan
Prioritize modifications and allocate funds for materials, labor, permits, and a contingency reserve. Review homeowner insurance policies to verify coverage for potential remodeling damages.
Success Check: Incorporate at least 10 percent of the total budget as a buffer for unforeseen expenses.
3. Hire a Certified Professional for Structural or Electrical Work
Engage a licensed contractor for tasks like wall removals, electrical system upgrades, or plumbing rerouting. Seek specialists holding Certified Aging-in-Place Specialist (CAPS) credentials through targeted searches.
Success Check: Validate licenses and secure at least three written estimates from qualified providers.
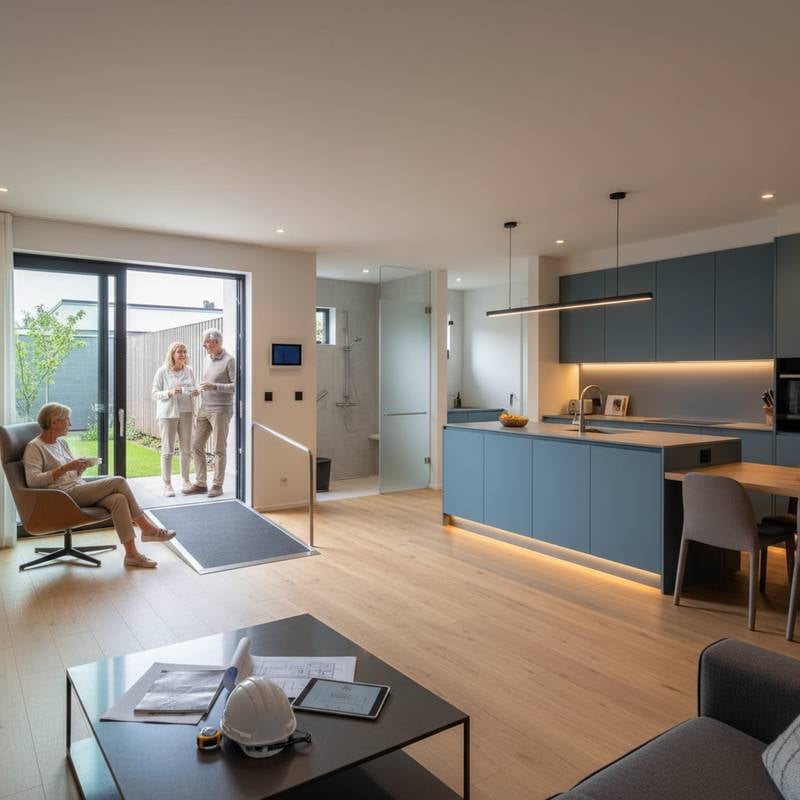
4. Improve Entry and Exit Access
Add ramps or eliminate steps at exterior doors to facilitate easy passage. Maintain a slope of 1 inch rise per 12 inches of run for ramps. Swap out raised thresholds for flush, low-profile alternatives.
Safety Tip: Select treated lumber or exterior-rated concrete to withstand weather exposure.
Success Check: Navigate entries and exits without tripping hazards or steep inclines.
5. Modify Doorways and Hallways
Expand doorways to a minimum width of 36 inches to accommodate wheelchairs or walkers. Ensure hallways provide unobstructed paths for mobility aids. Install lever-style handles in place of traditional round knobs.
Safety Tip: Inspect wall framing integrity prior to any cutting or alterations.
Success Check: Move through spaces without obstructions or contact with door frames and walls.
6. Update Bathroom Safety
Convert standard bathtubs to walk-in showers featuring non-slip flooring and integrated seating. Mount grab bars adjacent to toilets and shower areas. Adjust toilet heights to range from 17 to 19 inches for easier use.
Safety Tip: Apply waterproof sealant to all fasteners to inhibit corrosion from moisture.
Success Check: Verify stable surfaces and proper drainage in the updated bathroom.
7. Improve Lighting and Visibility
Position bright, consistent lighting throughout every room to eliminate dark spots. Incorporate motion-activated sensors and low-level night lights in hallways. Install under-cabinet fixtures in kitchens for task illumination.
Safety Tip: Disconnect power sources before installing or wiring new light fixtures.
Success Check: Confirm even illumination across rooms, free from harsh shadows or excessive glare.
8. Adjust Kitchen Layout
Reduce countertop heights to 34 inches to support seated preparation. Store everyday items at reachable levels to minimize stretching. Replace knobs with pull-style handles on cabinets and drawers.
Safety Tip: Scan for hidden wires or pipes before modifying counter structures.
Success Check: Prepare meals and perform cleanup tasks without undue bending or overreaching.
9. Upgrade Flooring
Opt for slip-resistant materials such as vinyl plank, cork, or textured ceramic tile over glossy surfaces. Limit transition strips to a maximum height of 0.5 inches for seamless movement.
Safety Tip: Don a dust mask during flooring cutting to protect against airborne particles.
Success Check: Experience firm footing on floors with smooth, even transitions.
10. Test All Modifications
Evaluate the stability of grab bars, the incline of ramps, the intensity of lighting, and the functionality of doors. Simulate routine activities to ensure practical usability.
Success Check: Confirm that each update operates reliably for the intended mobility needs.
Quality Checks and Troubleshooting
Common Failure Points
- Insecure grab bars due to inadequate anchoring into studs or blocking
- Leaks developing around walk-in shower perimeters
- Ramps with irregular surfaces or weakened support framing
- Lighting setups that produce uneven glare or persistent shadows
Simple Fixes
- Secure grab bar screws firmly into load-bearing wall studs or added blocking.
- Apply fresh waterproof caulk to seal shower edges and joints.
- Use a level to verify ramp pitch and reinforce sagging elements.
- Swap bulbs for high-lumen, warm-white LED options to enhance visibility without strain.
Contact a licensed contractor immediately if any element shows ongoing instability or malfunction. Steer clear of makeshift solutions, such as stick-on grab bars or unanchored ramps, which compromise safety.
When to Call a Pro
Thresholds for Help
Engage a licensed contractor for projects that include:
- Removing or altering load-bearing walls and frames
- Rewiring electrical systems or upgrading service panels
- Relocating plumbing lines or installing new fixtures
- Pouring concrete for ramps or modifying foundations
These activities necessitate permits and official inspections. Proceeding without expert involvement invites personal injury, code infractions, and potential insurance claim rejections.
Typical Costs
- Professional design consultation: $500 to $2,000
- Door widening: $800 to $2,500 per door
- Bathroom remodel: $10,000 to $25,000
- Ramp installation: $3,000 to $8,000
- Lighting upgrades: $1,000 to $4,000
Regional factors and material selections influence final pricing. Obtain a minimum of three detailed written bids prior to commitment. Verify that contractors maintain liability insurance and workers compensation coverage.
How to Vet a Contractor
- Request the current license number and confirm validity through official online databases.
- Seek references from comparable accessibility projects.
- Examine photos documenting previous installations.
- Secure written agreements on warranties, timelines, and payment schedules.
- Refrain from full upfront payments under any circumstances.
FAQs
What does aging in place mean?
Adapting the home environment enables independent living as health or mobility changes occur over time.
Do I need a permit for accessibility remodeling?
Permits apply to changes involving plumbing, electrical, or structural components. Surface-level updates like hardware swaps or lighting additions typically bypass this requirement.
How long does an aging-in-place remodel take?
Timelines range from several weeks to a few months, influenced by project scale, material availability, and contractor availability.
Can I do any of this myself?
Handle straightforward tasks such as installing grab bars, upgrading lights, or changing door hardware. Delegate structural, electrical, or plumbing work to professionals.
Are there funding programs to help cover costs?
Local housing authorities and nonprofits provide grants or low-interest loans for accessibility enhancements. Consult the municipal housing office for eligibility details.
Do these upgrades increase home value?
Accessibility features broaden buyer appeal and lower ongoing maintenance expenses, often boosting resale potential.
What flooring is best for safety?
Choose slip-resistant vinyl or low-gloss textured tile for superior grip and straightforward cleaning.
Securing Long-Term Independence
Aging in place extends beyond immediate modifications to foster enduring safety and autonomy. Investments in professional guidance and quality materials yield sustained benefits, including reduced fall risks and preserved home equity. Regular inspections ensure adaptations remain effective, allowing continued community ties and daily ease for years ahead.


