Universal Design: Age-Proof Your Bathroom for Life
Quick Answer Box
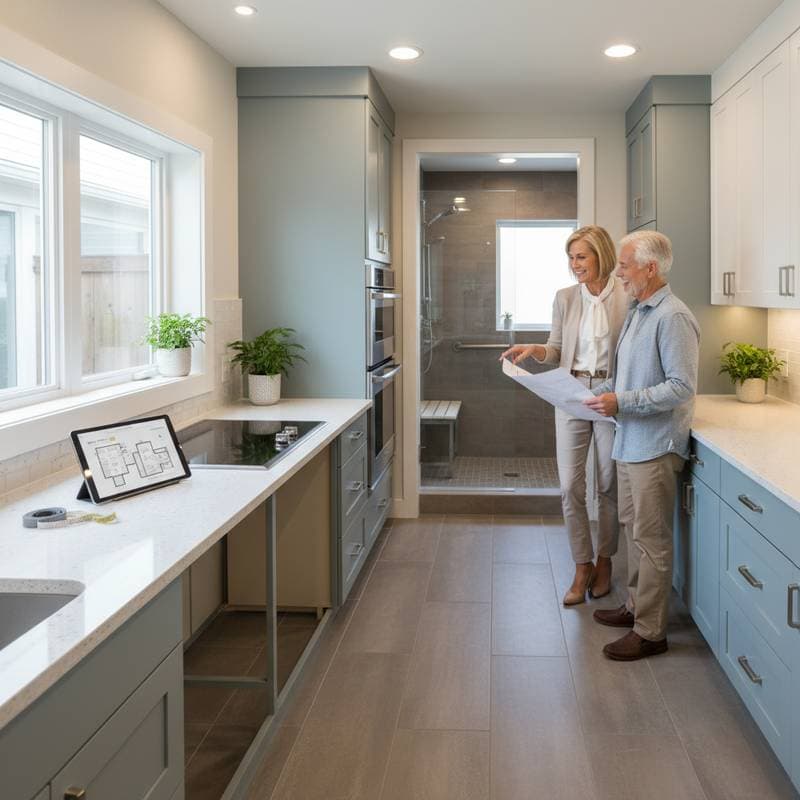
A universal design bathroom remodel creates a space that accommodates all ages and abilities. Homeowners can handle small updates such as installing grab bars and lever faucets, while major projects like barrier-free showers require a licensed contractor. Costs range from a few hundred dollars for minor changes to several thousand dollars for complete remodels. Projects take one day for simple upgrades or one to two weeks for full renovations. Key risks include slips, electrical hazards, and plumbing leaks; always follow safety protocols and shut off utilities before beginning work.
Step-by-Step Instructions
1. Plan the Layout
Begin by measuring the bathroom space, including entry widths, fixture placements, and turning radii. A universal design layout requires at least 60 inches of clear turning space to accommodate a wheelchair. Verify that doorways measure 32 inches wide or more, and map out grab bar positions near the toilet, tub, and shower.
Check: The plan reveals clear paths without obstructions between fixtures.
2. Improve Accessibility at the Entry
Widen narrow doors or replace traditional knobs with lever handles for easier operation. When replacing a door, ensure it swings outward to avoid blocking pathways during emergencies. Test the swing path to confirm unobstructed access.
Check: The door operates smoothly and allows full clearance for mobility aids like walkers or wheelchairs.
3. Upgrade the Flooring
Slip Risk: Shut off water supply lines and clear the floor area completely before starting any work.
Remove the existing flooring and install a non-slip material, such as textured porcelain tile with a coefficient of friction above 0.6, vinyl plank rated for wet areas, or rubber mats designed for bathrooms. Ensure seams align tightly to prevent tripping hazards.
Check: The new surface provides stable footing with no raised edges or gaps.
4. Adjust the Toilet Height
Select and install a comfort-height toilet, measuring 17 to 19 inches from the floor to the seat top, to minimize strain on knees and hips. Secure the fixture with a wax ring and bolts capable of supporting its weight, typically up to 300 pounds. Position the toilet at least 15 inches from any sidewall for adequate legroom.
Check: The toilet remains steady without rocking, and the seal holds without leaks during multiple flushes.
5. Replace Faucets and Controls
Opt for lever-style handles over knobs to accommodate users with reduced grip strength. Integrate thermostatic mixing valves that maintain consistent water temperatures and prevent sudden scalding. Mount controls at a height of 34 inches from the floor for seated access.
Check: Water flows and temperatures adjust effortlessly without resistance or sticking.
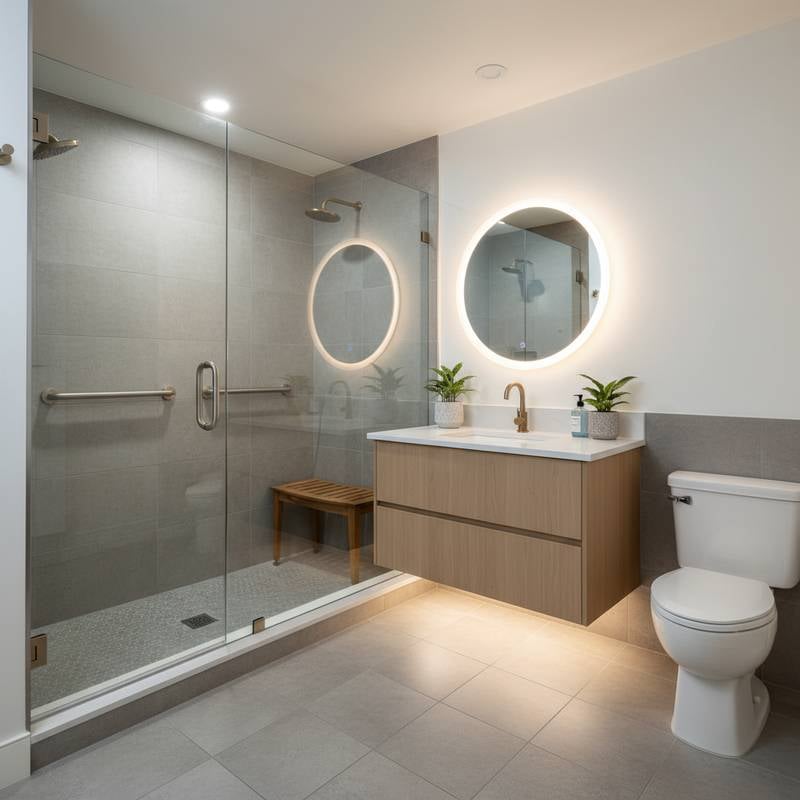
6. Install Grab Bars
Wall Reinforcement Warning: Locate wall studs or add a reinforced backing plate, such as a plywood block, before mounting any grab bars. Avoid securing bars solely to drywall, as this compromises safety.
Position horizontal bars near the toilet and shower entrance at 33 to 36 inches from the floor, and add vertical bars for standing support. Use bars rated to hold at least 250 pounds, and space them 24 to 36 inches apart for optimal leverage.
Check: Each bar withstands full body weight without shifting or loosening.
7. Update the Shower or Tub
Plumbing Hazard: Engage a licensed plumber for any relocation of drains or supply lines to ensure code compliance.
Convert a standard tub to a low-threshold or curbless shower with a linear drain for seamless entry. Add a handheld showerhead on a 48-inch adjustable slide bar, along with a fold-down seat positioned 17 to 19 inches high and a built-in bench for extended use.
Check: Water drains completely without pooling, and all joints seal tightly with waterproof silicone caulk.
8. Improve Lighting and Visibility
Incorporate layered lighting options, including overhead fixtures for general illumination, task lights above mirrors, and accent strips for shadows. Select LED bulbs emitting warm white light at 2700K to reduce eye strain. Install motion-activated nightlights near the floor and dimmable switches for adjustable brightness.
Electrical Hazard: Equip all outlets within six feet of water sources with GFCI protection. Hire a licensed electrician for any new wiring or circuit additions.
Check: The lighting delivers even, glare-free illumination across the space.
9. Reposition Storage and Accessories
Mount shelves and towel racks at 36 to 48 inches from the floor to facilitate easy access for users of varying heights. Replace deep cabinets with pull-out drawers or open shelving to eliminate the need for excessive bending or reaching. Organize items by frequency of use, placing essentials at waist level.
Check: Daily necessities remain within reach without requiring stretching, crouching, or climbing.
10. Seal, Caulk, and Test
Apply a high-quality waterproof caulk around all fixtures, edges, and trim joints, allowing 24 hours for full curing. Reconnect water lines securely and restore electrical power only after verifying connections. Run water through all fixtures and inspect for issues.
Check: No leaks form at joints or connections, and every fixture functions safely and efficiently.
Quality Checks and Troubleshooting
Common Failure Points
- Loose Grab Bars: These issues arise from inadequate anchoring; resolve by reinstalling with a blocking plate or heavy-duty stud-mounted brackets.
- Leaky Faucet Connections: Use an adjustable wrench to tighten fittings gradually, stopping short of over-tightening to avoid damaging threads.
- Uneven Flooring: Level the subfloor with a self-leveling compound before laying new material, ensuring variations do not exceed 1/8 inch over 10 feet.
- Water Pooling in Shower: Confirm the floor slopes at least 1/4 inch per foot toward the drain; adjust with thinset mortar if needed.
Simple Fixes
- Dim Lighting: Swap in LED bulbs with lumens rated at 800 or higher for brighter output without increased energy use.
- Noisy Toilet Fill: Install a fluidmaster fill valve designed for quiet operation to dampen water rush sounds.
- Low Water Pressure: Remove and clean aerators with vinegar solution, then flush showerheads to clear mineral buildup.
When to Call a Pro
Thresholds for Professional Help
Engage a licensed contractor for tasks involving plumbing relocations, electrical rewiring, structural modifications to walls or subfloors, or curbless shower installations. These elements demand specialized tools and adherence to building codes to prevent hazards. Professionals also handle permit applications where required.
Typical Cost Ranges
- Minor accessibility updates, such as grab bars and lever handles: $500 to $2,000.
- Mid-level remodels including new fixtures and flooring: $5,000 to $10,000.
- Full universal design renovations with layout alterations: $15,000 to $25,000.
How to Vet a Contractor
Confirm the contractor holds a valid license and carries liability insurance covering at least $1 million. Request references from three recent accessibility-focused projects, and contact those clients for feedback. Obtain detailed written estimates outlining materials, labor, and timelines. Inquire about the contractor's familiarity with ADA guidelines and universal design principles.
Pro Tips for Success
Prioritize functionality by selecting moisture-resistant finishes with proven slip resistance. Maintain clear pathways by securing all mats with non-slip backing and avoiding loose rugs. Enhance visibility through color contrasts, such as dark floors against light walls. Choose a comfort-height vanity with knee space underneath for wheelchair access. Prepare for future needs by installing wall blocking during initial construction. Verify fixture ergonomics by testing with potential users before permanent installation.
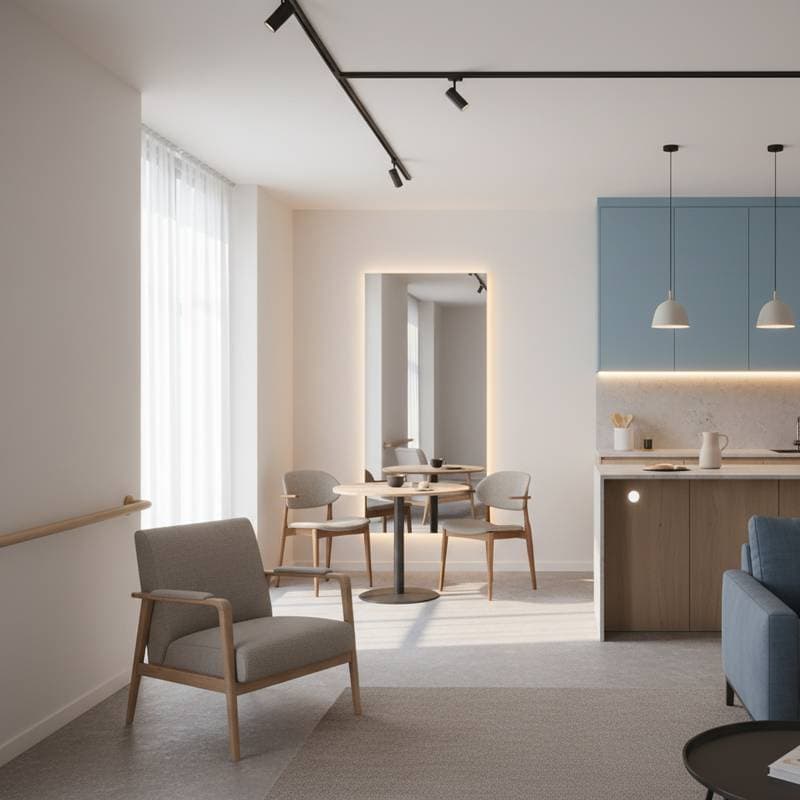
Implementing Your Age-Proof Bathroom
A thoughtfully designed bathroom promotes safety, comfort, and independence across generations. Universal design principles benefit children, adults, and seniors alike by anticipating diverse needs. Focus on meticulous planning, precise execution, and routine maintenance to maximize longevity.
Initiate changes with impactful elements like reinforced grab bars, intuitive lever controls, and durable slip-resistant surfaces. For comprehensive transformations, partner with a contractor experienced in accessibility and aesthetics. Regular inspections preserve the space's effectiveness as your requirements change over time.
FAQs
What is universal design in a bathroom?
It refers to layouts and features engineered for usability by individuals of all ages and abilities, eliminating the need for specialized modifications.
Do I need a permit for grab bars?
Permits are typically unnecessary for surface-mounted installations, but obtain one if the work involves opening walls, altering plumbing, or modifying electrical systems.
What is the best non-slip flooring for a bathroom?
Textured porcelain tile or vinyl plank flooring with a wet dynamic coefficient of friction exceeding 0.42 offers superior grip and durability.
How high should grab bars be installed?
Mount them 33 to 36 inches above the floor, fine-tuning the height based on the primary users' preferences and mobility levels.
Can I make my current shower barrier-free?
Yes, conversion to a curbless setup is feasible, though it usually requires a professional to reconfigure the drain and ensure proper waterproofing.