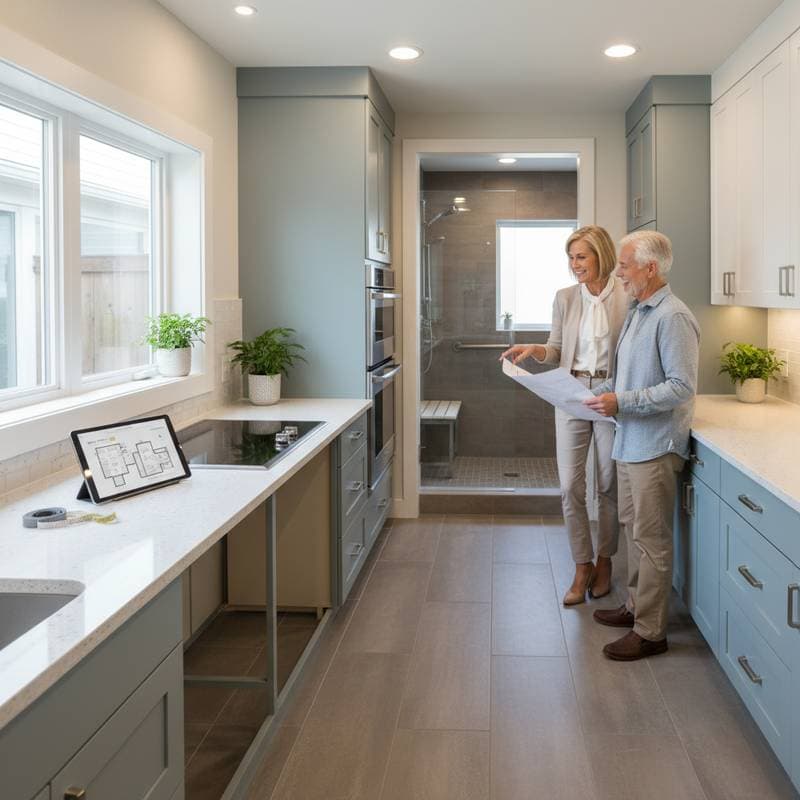
Breaking Down 2025 Costs for Aging-in-Place Remodels
Aging-in-place remodeling enables homeowners to maintain comfort, safety, and independence as mobility and accessibility requirements evolve. This guide details anticipated costs, timelines, and options for modifying a home to support long-term residency.
Quick Overview
This article presents typical costs, timelines, and decisions for aging-in-place remodeling projects. Readers will gain insights into estimating expenses, selecting between DIY efforts and professional services, and implementing upgrades that enhance comfort, safety, and accessibility.
Cost and Time Estimates
Costs for aging-in-place remodels vary based on home size, project scope, and material choices. Across the nation, homeowners encounter these average ranges:
- Minor accessibility upgrades: $2,500 to $10,000
Examples include grab bars, lever handles, and handheld showerheads. - Bathroom remodel for accessibility: $15,000 to $40,000
Examples include curbless showers, widened doorways, and non-slip flooring. - Kitchen remodel for accessibility: $25,000 to $60,000
Examples include lowered counters, side-opening ovens, and pull-out shelves. - Whole-home modifications: $60,000 to $150,000
Examples include ramps, stair lifts, widened hallways, and lighting upgrades.
Professional installations generally require 2 to 8 weeks, depending on project complexity. An experienced individual handling smaller tasks through DIY methods might dedicate several weekends.
Difficulty rating: Moderate to Advanced
Smaller updates, such as installing grab bars, prove straightforward. Structural alterations, like widening doors or constructing ramps, demand technical expertise and familiarity with building codes.
Cost Factors
Labor rates increase in urban locations or areas with fewer available contractors. Selecting premium fixtures and finishes elevates the overall budget. Permits and inspections become necessary for structural or electrical modifications. Custom accessibility equipment, such as lifts, ramps, or specialized cabinetry, contributes additional expenses.
DIY vs Professional Guidance
When DIY Works
Individuals with basic tools and carpentry skills can manage smaller projects safely. Suitable examples include:
- Installing grab bars securely into wall studs.
- Replacing round knobs with lever handles.
- Applying anti-slip strips to existing flooring.
Such initiatives typically cost less than $500 and require only a few hours.
When to Hire a Professional
Engage a licensed contractor for:
- Structural modifications, including widening doors or lowering counters.
- Electrical or plumbing alterations.
- Installation of ramps, lifts, or stair adaptations.
- Ensuring adherence to accessibility codes and obtaining permits.
Professional labor accounts for 30 to 50 percent of material expenses, yet it provides safety assurances, compliance with inspections, and warranty protection.
Step-by-Step Instructions: Converting a Bathroom for Accessibility
Tools and Materials
Gather a measuring tape, level, drill, stud finder, and tile saw. Include grab bars rated for at least 250 pounds, non-slip flooring, a curbless shower base or walk-in tub, a handheld shower with adjustable mount, lever-handle faucets, a waterproofing membrane, and grout.
Steps
-
Assess the layout.
Measure doorways and pathways to confirm at least 36 inches of clearance for wheelchairs or walkers.
Check: Movement occurs freely without the need to turn sideways. -
Plan plumbing and electrical changes.
Mark locations for new fixtures and verify compliance with local codes.
Check: Outlets feature GFCI protection, and fixtures remain accessible from a seated position. -
Demolish existing materials.
Remove flooring, the tub, and fixtures with care. Shut off water supply prior to beginning.
Warning: Electrical Hazard Disconnect power sources when removing light fixtures. -
Install the curbless shower base.
Establish proper slope for drainage and apply waterproofing to the floor and walls.
Check: Water directs toward the drain without forming pools. -
Add non-slip flooring.
Select textured tile or vinyl possessing a suitable slip resistance rating.
Check: The surface provides secure footing when wet. -
Mount grab bars.
Drill through tile into wall studs using stainless steel screws.
Check: Bars remain stable under firm pressure. -
Install fixtures and lighting.
Incorporate lever faucets, a handheld shower, and bright, glare-free lighting.
Check: Controls prove reachable and simple to operate. -
Seal and test.
Apply caulk to all joints and conduct leak tests.
Check: Fixtures function properly, and the floor remains dry.
Safety Warnings and Tips
Caution: Fall Risk Employ stable ladders and non-slip footwear during the installation process. Warning: Electrical Hazard Deactivate power before working on any wiring for new fixtures. Don proper gloves, goggles, and a dust mask when cutting or sanding materials. Ensure grab bars secure into studs rather than relying solely on drywall anchors.
Troubleshooting and Quality Checks
- Water pooling in shower: Reexamine the slope and drainage setup.
- Loose grab bar: Substitute with longer screws or realign to a stud.
- Uneven floor: Apply leveling compound prior to tile installation.
- Lighting glare: Opt for diffused fixtures or adjust light positions.
Upon finishing, navigate the space with a mobility aid if relevant. Verify that controls, outlets, and fixtures fall within comfortable reach.
Cleanup and Disposal
Clear away construction debris and outdated fixtures. Recycle metals, glass, and tile through local facilities when permitted. Follow municipal guidelines for disposing of adhesives and grout containers. Clean all surfaces thoroughly and vacuum dust before utilizing the area.
Maintenance and Lifespan
Conduct inspections of grab bars, flooring, and seals every six months. Address worn caulk promptly to avoid leaks.
- Grab bars and fixtures endure 10 to 15 years.
- Non-slip flooring persists 15 to 20 years with regular cleaning.
- Lighting upgrades necessitate occasional bulb or fixture replacements.
Maintain a log to record inspections and repairs.
When to Call a Professional
Seek professional assistance if:
- Structural framing requires alteration.
- Plumbing or electrical rerouting becomes necessary.
- Permits or inspections apply.
- Uncertainty arises regarding code compliance.
Professional cost ranges:
- Bathroom remodel: $20,000 to $40,000
- Kitchen remodel: $30,000 to $60,000
- Whole-home updates: $70,000 to $150,000
Contractor checklist:
- Confirm licensing and insurance coverage.
- Obtain a detailed cost estimate.
- Request references and examples of prior accessibility projects.
- Examine warranties for labor and materials.
Pro Tips for Success
Initiate with a comprehensive accessibility audit prior to major planning. Integrate safety and comfort enhancements within a single project to minimize labor expenses. Select contrasting colors to improve visibility in dim conditions. Simulate layouts using mobility aids to validate reach and clearance. Allocate at least 10 percent of the budget for unforeseen structural or plumbing challenges.
A well-executed aging-in-place remodel enhances safety, fosters independence, and increases property value. Through meticulous planning and a blend of DIY initiatives with professional input, homeowners create environments that promote comfort and mobility over extended periods.