Validation Step: Walk the surface barefoot to assess grip and stability; it must feel secure without wobbling or raised seams.
3. Create a Seamless Curbless Shower
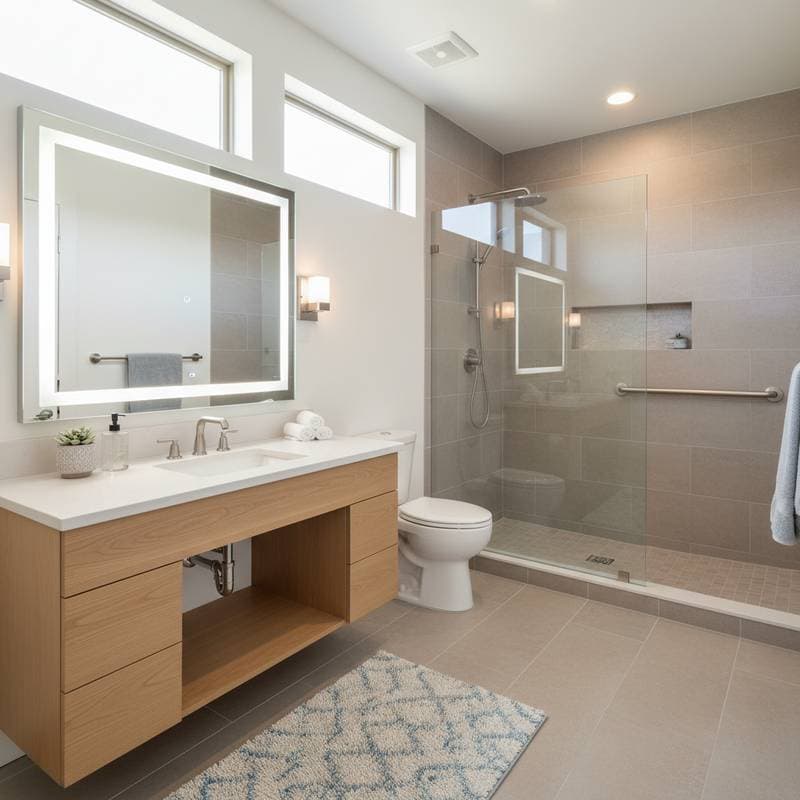
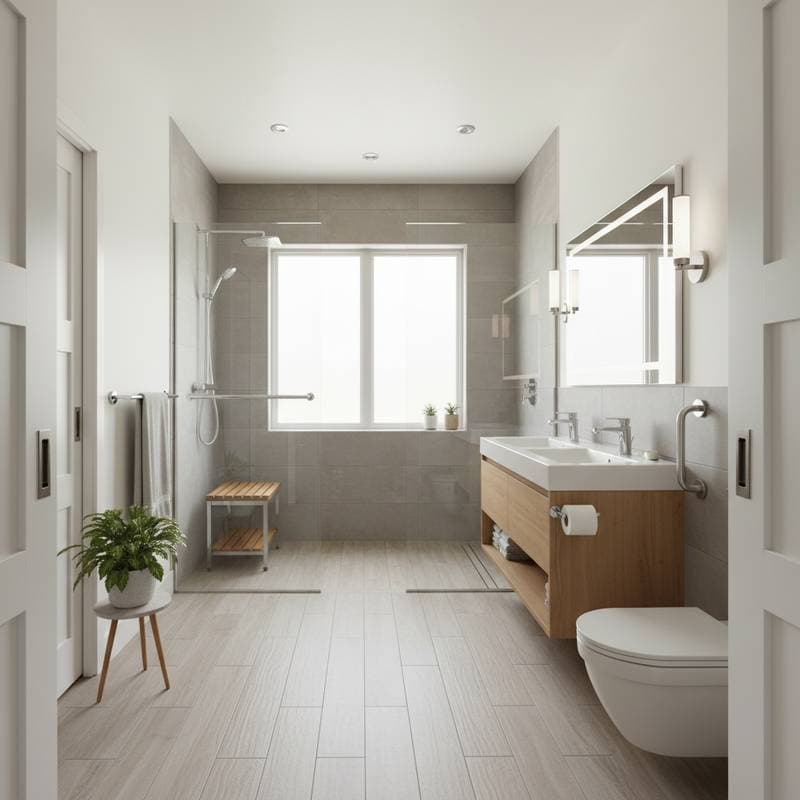
Demolish the existing tub or shower enclosure, disposing of debris responsibly. Level the subfloor and install a linear drain system to facilitate proper water flow. Slope the shower area gently, at a one-quarter-inch drop per foot, toward the drain using self-leveling compounds.
Line the space with a waterproof membrane, such as liquid-applied coatings or sheet barriers, to prevent leaks. Tile the walls and floor with materials featuring a coefficient of friction above 0.6 for safety. Integrate a fold-down bench or built-in seat for resting.
Validation Step: Run water through the shower and observe drainage; no standing water should remain after five minutes.
4. Securely Install Grab Bars
Identify wall studs using a reliable detector, marking positions adjacent to the toilet, within the shower, and along entry paths. Select bars made of corrosion-resistant materials, 1.25 to 1.5 inches in diameter for comfortable grip. Space installations 33 to 36 inches above the floor for optimal support.
Pre-drill holes to avoid cracking, then fasten with lag screws or toggle bolts rated for at least 250 pounds. Apply silicone caulk around mounts to seal against moisture. Test each bar rigorously before regular use.
Safety Warning: Avoid mounting solely to drywall; improper installation risks failure under weight.
Validation Step: Apply full body weight to each bar; it must remain immobile and firm.
5. Select and Install Accessible Fixtures
Opt for lever-style faucets that require single-handed operation, avoiding twist knobs that demand fine motor skills. Mount a handheld showerhead on an adjustable slide bar, positioned 48 to 72 inches high for versatility. Choose elongated, comfort-height toilets at 17 to 19 inches for easier rising.
Disconnect old fixtures carefully, capping lines to prevent water loss. Install new components with thread seal tape on connections, ensuring tight, leak-free fits. Adjust heights and angles to suit user preferences during setup.
Validation Step: Operate all elements with one hand; mechanisms should respond effortlessly without sticking.
6. Enhance Illumination and Visibility
Position task lighting above the vanity and within the shower enclosure, aiming for 70 to 100 foot-candles of brightness. Install dimmable LED bulbs with a 4000K color temperature to mimic natural daylight. Incorporate pathway lights or motion-activated strips along floors for low-light navigation.
Wire fixtures to existing circuits or add dedicated lines through a professional if needed. Use frosted diffusers to eliminate glare while distributing light evenly. Integrate exhaust fans with humidity sensors to maintain clear air.
Validation Step: Inspect for shadow-free coverage in mirrors and corners; adjust as necessary for uniform illumination.
Addressing Common Challenges
During or after installation, issues may arise that require prompt resolution. For water accumulation in the shower, recalibrate the slope using a laser level and add shims under the pan if drainage proves inadequate.
If grab bars wobble, reinforce anchors with metal plates or replace screws with heavier-duty versions. Dim lighting often stems from mismatched bulbs; upgrade to higher-lumen options or supplement with additional fixtures.
Final Quality Assurance
Conduct a comprehensive walkthrough to confirm level surfaces throughout. Test fixtures for drips by running water for several minutes. Tug on all hardware to verify secure attachment, addressing any instability immediately.
Document the setup with photos for future reference. Schedule a professional inspection if codes apply, ensuring long-term compliance and peace of mind.
Sustaining Your Universal Design Investment
Regular upkeep preserves the bathroom's functionality and appearance. Every six months, examine grab bars for tightness, resecure as needed, and inspect caulk for gaps or degradation, reapplying fresh sealant promptly.
Clean slip-resistant floors with pH-neutral cleaners to retain their grippy texture, avoiding harsh abrasives that wear down surfaces. Fixtures in universal designs endure 15 to 25 years with diligent care, outlasting standard installations.
Replace LED bulbs infrequently, selecting energy-efficient models that reduce utility costs. Monitor ventilation to control humidity, preventing mold growth on grout and tiles.
Maximizing Accessibility and Appeal
Incorporate visual cues like high-contrast flooring against walls to aid those with low vision. Install adjustable shelving units or rotating caddies for effortless organization of essentials.
Select coordinating accessories, such as teak shower seats or woven mats, to harmonize with the room's palette. Position daily items at ergonomic heights to minimize stretching or bending risks.
Ensure robust airflow through strategically placed vents, combating condensation effectively. These refinements not only heighten usability but also elevate the space's inviting quality.
Through strategic planning and quality materials, a universal design bathroom becomes a cornerstone of resilient living. It fosters autonomy, diminishes accident potential, and adapts seamlessly to changing needs, delivering enduring value to the household.


