Building Homes for Lifelong Accessibility: Universal Design Principles for 2026
Universal design transforms ordinary homes into versatile spaces that accommodate people of all ages, abilities, and mobility levels. These principles emphasize flexibility, simplicity, and intuitive use, ensuring that renovations enhance daily life without compromising aesthetics. Homeowners who incorporate universal design early can avoid costly retrofits later, while boosting property value and independence for residents.
Essential Overview of Universal Design
Universal design focuses on seven core principles: equitable use, flexibility in use, simple and intuitive operation, perceptible information, tolerance for error, low physical effort, and size and space for approach and use. In practice, this means creating environments where children, adults, seniors, and individuals with disabilities navigate effortlessly. For 2026, trends highlight smart integrations like voice-activated controls and sustainable materials that align with these ideals, making homes both forward-thinking and inclusive.
Professionals recommend starting with a home audit to pinpoint areas needing improvement, such as narrow hallways or steep stairs. This approach not only promotes safety but also fosters emotional well-being by reducing frustration in everyday tasks. As demographics shift toward aging populations, universal design becomes a smart investment for long-term livability.
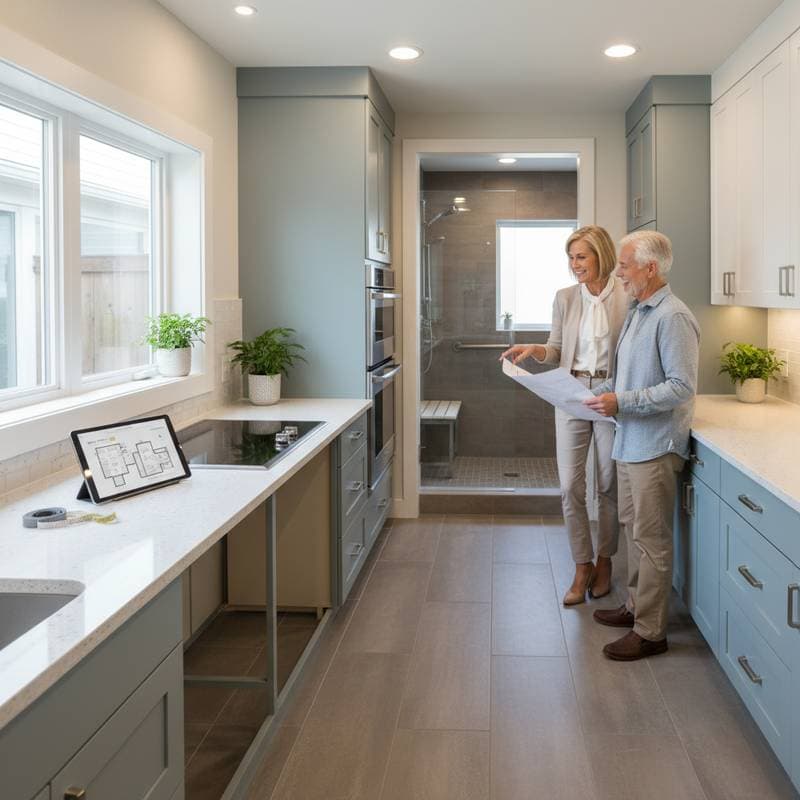
Detailed Cost and Timeline Breakdown
Renovation expenses for universal design depend on project scale, location, and material choices. A comprehensive whole-home update typically ranges from $10,000 to $50,000, covering structural adjustments and fixture replacements. Specific areas break down as follows:
- Bathrooms: Accessibility modifications, including curbless showers and reinforced walls, cost $8,000 to $20,000.
- Kitchens: Layout expansions with lower counters and pull-out shelves run $15,000 to $40,000, influenced by appliance selections and cabinetry.
- Entryways and Hallways: Zero-threshold doors and widened passages add $5,000 to $15,000.
Factors like regional labor rates, premium eco-friendly materials, and necessary permits can increase totals by 20 to 30 percent. Timelines vary: a full remodel requires four to eight weeks with a skilled team, allowing for permits and inspections. Smaller updates, such as lighting installations, complete in one to two days. Assign a difficulty rating of moderate to advanced, as projects often involve coordination with trades like plumbers and electricians.
Balancing DIY Efforts with Professional Expertise
Homeowners with basic skills can tackle straightforward enhancements to build confidence and save on labor. Suitable DIY tasks include:
- Swapping traditional doorknobs for lever-style handles, which require only a screwdriver and take under an hour per door.
- Mounting adjustable showerheads with anti-scald features, ensuring easy height changes for different users.
- Installing battery-operated night lights in high-traffic zones like hallways and bathrooms to prevent nighttime stumbles.
These efforts cost less than $500 in materials from local hardware stores. However, complex alterations demand licensed professionals to comply with building codes and avoid hazards. Delegate to experts tasks such as:
- Expanding doorways to 36 inches or more for unobstructed passage.
- Rerouting plumbing for roll-in showers or lowered sinks.
- Constructing ramped entries or installing reinforced framing for grab bars.
Professional interventions range from $5,000 to $50,000, with hourly rates of $75 to $150. This division ensures quality while empowering owners to personalize their spaces.
Step-by-Step Guide to Implementation
Follow this structured process to integrate universal design effectively, starting with evaluation and progressing to refinement.
-
Evaluate the Existing Layout
Walk through each room to note challenges like narrow doorways, elevated thresholds, or dim corners. Measure spaces for a minimum 60-inch turning radius to accommodate wheelchairs or walkers. Verify success by simulating movement: navigate the home with temporary aids to identify barriers. -
Design Core Accessibility Elements
Prioritize features like step-free entrances, hallways at least 42 inches wide, and open-concept layouts that eliminate clutter. Opt for durable, slip-resistant flooring such as cork or textured vinyl. Confirm the plan supports fluid circulation with at least 36-inch clear pathways between furniture and walls. -
Enhance Bathroom Functionality and Safety
Convert traditional tubs to walk-in showers with fold-down seats and handheld sprayers for versatile use. Position grab bars near toilets and showers, ensuring they support 250 pounds or more with proper wall anchoring. Install sinks at 34 inches high with knee space underneath for seated access. Test by reaching all elements from various heights and positions. -
Optimize Lighting and Control Systems
Replace toggle switches with large rocker-style ones placed 15 inches above floor level for easy access. Integrate motion-sensor lights in stairwells, kitchens, and exteriors to illuminate paths automatically. Add layered lighting: ambient overhead for general use, task-focused under cabinets for precision work. Evaluate by checking visibility in low-light conditions without straining. -
Select Inclusive Fixtures and Materials
Choose hardware like single-lever faucets and automatic door closers that require minimal force. Incorporate high-contrast edges on counters and steps to aid those with low vision. Select finishes such as matte paints and hardware-free cabinetry for smooth, intuitive interaction. Validate by operating all features with one hand or limited dexterity.
Critical Safety Considerations
Prioritize precautions to mitigate risks during and after renovations. For electrical work, always disconnect power at the breaker before handling switches or outlets to prevent shocks. Address fall prevention by selecting flooring with a coefficient of friction above 0.6 and securing area rugs with non-slip pads.
During installations, equip yourself with protective gear: heavy-duty gloves, safety goggles, and stable footwear. Consult local codes for load-bearing requirements, especially in older homes. These measures safeguard health and ensure modifications withstand daily wear.
Resolving Common Challenges
Anticipate issues to maintain project momentum. For uneven floor transitions, install beveled threshold ramps no higher than half an inch to comply with accessibility standards. If grab bars wobble post-installation, add wooden blocking inside walls during initial framing for secure mounting.
Dim areas benefit from LED under-cabinet strips or smart bulbs that adjust brightness via apps. Perform final quality checks by role-playing scenarios: traverse rooms with eyes closed or using a walker to confirm intuitive navigation. Address any snags promptly to uphold the design's integrity.
Proper Cleanup and Material Management
After completion, remove debris systematically to restore order and safety. Haul old tiles, pipes, and fixtures to designated recycling facilities, separating metals and plastics for environmental responsibility. Salvage usable items like undamaged mirrors or cabinets for donation or reuse in other projects.
Sweep thoroughly and vacuum dust to eliminate slip hazards, then air out the space to disperse any fumes from adhesives or paints. This phase reinforces the home's fresh start, aligning with universal design's emphasis on sustainable, hazard-free living.
Ongoing Maintenance Strategies
Sustain the benefits of universal design through routine care. Schedule annual inspections of grab bars for tightness, flooring for wear, and lighting for functionality. Refresh bathroom seals with silicone caulk every two to three years to prevent moisture damage and mold growth.
Adjustable elements like shelving or counter heights may need periodic tweaks as needs evolve. With diligent upkeep, these features endure 20 to 30 years, adapting seamlessly to changing circumstances. Document maintenance logs to track warranties and inform future updates.
Engaging Professionals for Complex Projects
Recognize limits and involve specialists for intricate work involving load-bearing walls, extensive wiring, or custom millwork. Certified contractors bring expertise in accessibility standards like ADA guidelines, ensuring compliance and durability.
Expect design consultations at $75 to $150 per hour, with full installations scaling accordingly. Vet professionals using this checklist:
- Confirm active licensing, bonding, and insurance coverage.
- Obtain detailed bids outlining materials, labor, and projected timelines.
- Inquire about post-project warranties and any specialized certifications in universal design.
This collaboration yields professional results tailored to unique home layouts.
Maximizing Value Through Strategic Choices
Begin implementations in high-impact zones, such as primary bathrooms or main entries, to realize quick wins in usability. Embrace modularity with height-adjustable counters and reconfigurable storage to future-proof against unforeseen needs. Ultimately, universal design elevates home safety, streamlines routines, and enhances market appeal, creating spaces that support vitality at every life chapter.