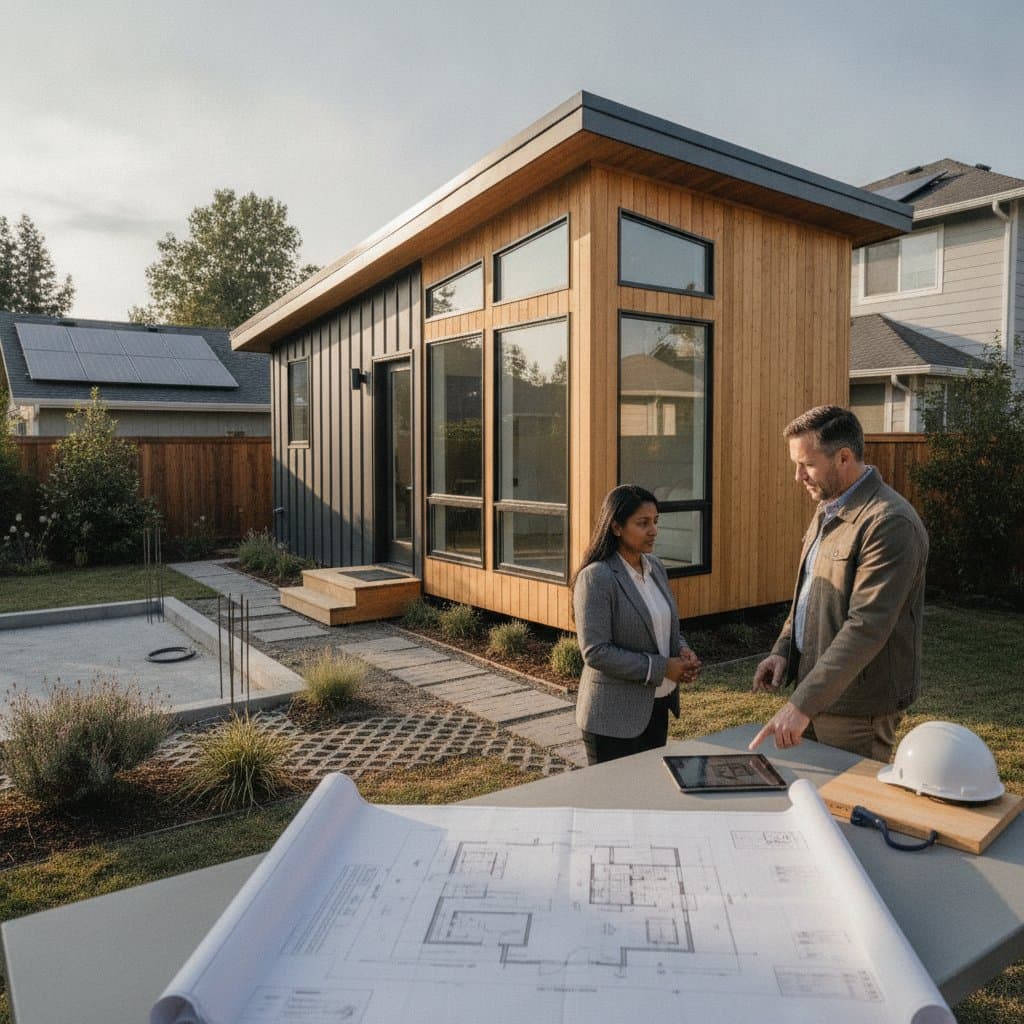
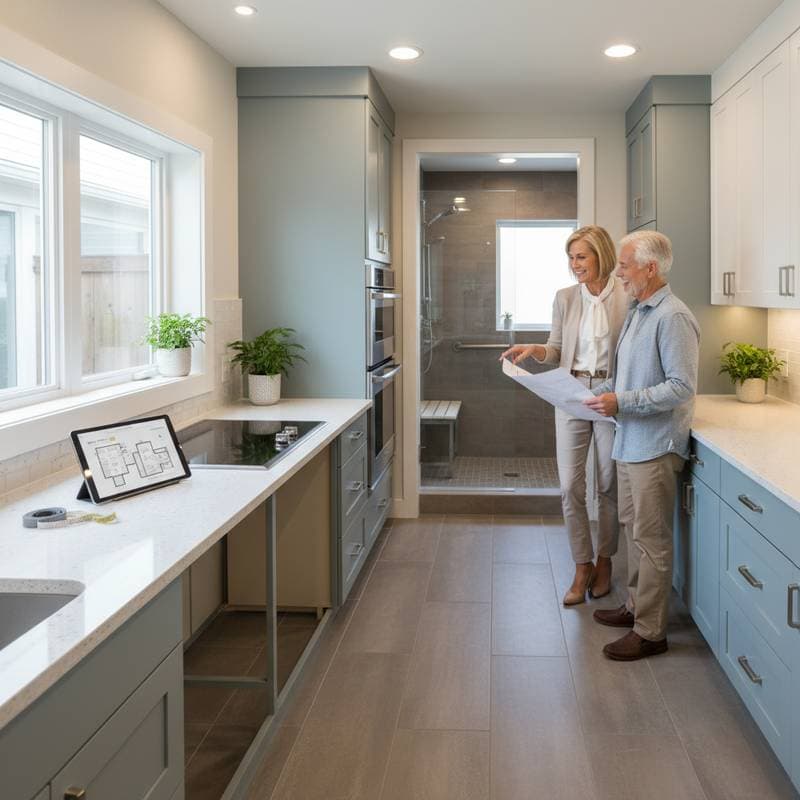
Key Elements of an Age-Friendly Bathroom Remodel
Aging in place requires bathrooms that prioritize safety and accessibility without sacrificing style. Common modifications include repositioning plumbing lines or drains, adding walk-in tubs or curbless showers, updating electrical circuits for enhanced lighting or ventilation, widening doors or adjusting wall framing, and applying waterproofing to shower zones while sealing tile joints. These changes reduce fall risks and support independent living.
Cost Comparison
Budgeting accurately helps balance quality and affordability. For a DIY project, expect expenses from $8,000 to $15,000, influenced by material selections and current setup. Professional services range from $18,000 to $45,000, covering permits, inspections, and comprehensive labor. Engaging experts guarantees adherence to building codes, effective waterproofing, and sustained performance.
Tools and Materials List
Prepare thoroughly to streamline the process.
Tools
- Power drill and screwdriver set
- Stud finder
- Level and measuring tape
- Utility knife
- Tile cutter or wet saw
- Adjustable wrench
- Caulking gun
- Safety glasses and gloves
Materials
- Non-slip flooring options such as vinyl, textured porcelain, or rubber tile
- Grab bars in stainless steel, measuring 18 to 36 inches
- Comfort-height toilet at 17 to 19 inches
- Walk-in or curbless shower base
- Handheld showerhead equipped with a slide bar
- Lever-style faucet handles
- ADA-compliant vanity or wall-mounted sink
- GFCI outlets and moisture-rated lighting
- Waterproof backer board and sealant
- Paint featuring a mold-resistant finish
Step-by-Step Instructions
Follow these stages methodically to achieve a functional outcome.
1. Assess Current Bathroom Layout
Measure available floor space, door dimensions, and fixture positions. Pinpoint mobility barriers like tight doorways or abrupt changes in level. Document plumbing and electrical placements to inform your design.
Verification: Ensure a minimum of 60 inches for turning with a wheelchair or walker.
2. Plan Accessibility Features
Select between a walk-in shower, tub, or combination. Incorporate at least one grab bar by the toilet and two within the shower area. Set counter heights from 32 to 34 inches to facilitate seated use.
Verification: Confirm unobstructed paths from entrance to shower and toilet.
3. Secure Permits and Schedule Inspections
Consult your local building authority to identify necessary approvals. Modifications to plumbing or electrical systems invariably demand oversight.
Verification: Obtain all clearances prior to starting demolition.
4. Demolition and Removal
Alert: Electrical Hazard
Disconnect water supply and power sources before detaching fixtures. Extract old tile, flooring, and components with care. Comply with community guidelines for debris disposal or recycling.
Verification: Prepare all areas cleanly for subsequent installations.
5. Update Plumbing and Electrical Systems
Advisory: Engage Licensed Professionals
Relocate drains and supply lines to accommodate new elements. Integrate GFCI outlets and lighting suitable for humid environments. Reinforce walls with blocking to support grab bars.
Verification: Align rough-ins with the revised plan and secure inspection approval.
6. Install Waterproofing and Subfloor
Repair any compromised subflooring. Deploy waterproof membranes or backer boards in wet zones. Bond seams using waterproof tape and certified sealants.
Verification: Achieve a flat, arid, and fully sealed foundation before applying tiles.
7. Install Flooring
Opt for textured, non-slip surfaces to minimize hazards. Maintain even transitions across materials.
Verification: Test for stability under load without movement.
8. Install Shower or Tub
Alert: Fall Risk
Seek assistance or hire specialists for positioning heavy units. In walk-in showers, verify drainage slope. For tubs, validate door integrity prior to operation.
Verification: Confirm efficient water flow and secure seals.
9. Mount Grab Bars and Seating
Anchor bars into studs or blocking at 33 to 36 inches from the floor. Fit fold-down seats or benches supporting at least 250 pounds.
Verification: Ensure stability under firm pressure.
10. Install Toilet and Vanity
Position a comfort-height toilet to simplify transfers. Choose wall-mounted or pedestal-free vanities for under-clearance.
Verification: Secure all units level and free of leaks.
11. Install Faucets, Lighting, and Accessories
Select lever handles for reduced effort. Arrange illumination to avoid shadows around reflective surfaces. Attach a handheld showerhead with a 60-inch hose.
Verification: Validate smooth, hazard-free operation.
12. Final Inspection and Testing
Evaluate water flow, drainage efficiency, and light functionality. Verify GFCI responses. Simulate navigation using mobility devices.
Verification: Attest to complete operability and security.
Safety Warnings and Tips
Prioritize precautions throughout. Shut off power before electrical tasks. Maintain dry floors with non-slip aids. Don protective gear for cutting activities. Operate ventilation to control humidity and inhibit mold growth. Confirm anchors penetrate studs for load-bearing elements.
Troubleshooting and Quality Checks
Address issues promptly to uphold standards.
Common Problems and Fixes
- Water accumulation at shower thresholds: Reassess slope and modify curbs.
- Unstable grab bars: Bolster with robust anchors or extra reinforcement.
- Intermittent lighting: Substitute with damp-rated units or inspect circuits.
- Delayed drainage: Remove blockages or correct pipe inclines.
Quality Checks
- Level, slip-resistant flooring.
- Firm, watertight fixtures.
- Uniform, adequate illumination.
- Functional GFCI protections.
Cleanup and Disposal
Clear waste immediately to avoid accidents. Recycle salvageable items like fixtures and metals. Handle treated materials per hazardous waste protocols. Wipe down areas with gentle cleaners before occupancy.
Maintenance and Lifespan
Sustain the space through consistent upkeep.
Routine Care
- Scrub grout and seals monthly against mold.
- Inspect and fasten supports yearly.
- Renew mats as they degrade.
- Examine GFCI units quarterly.
Typical Lifespan
- Tile and flooring: 15 to 25 years
- Fixtures and faucets: 10 to 20 years
- Lighting and ventilation: 8 to 15 years
- Grab bars and accessories: 10 years or more with diligence
When to Call a Professional
Delegate complex tasks for optimal results.
Indicators for Contractor Involvement
- Detection of structural issues or fungal growth.
- Necessity to shift plumbing or wiring.
- Implementation of seamless showers or bespoke pans.
- Uncertainty regarding regulations or accessibility norms.
Professional Remodel Cost Range
- Basic accessibility upgrade: $18,000 to $30,000
- Advanced or bespoke project: $35,000 to $45,000
Contractor Selection Checklist
- Credentials in relevant trades.
- Coverage for liability and labor.
- Client testimonials.
- Workmanship guarantees.
- Comprehensive bids including schedules and payments.
FAQ
What is the minimum door width for an accessible bathroom?
A minimum of 32 inches accommodates wheelchair passage.
Do I need special permits for an aging-in-place remodel?
Plumbing and electrical alterations generally require approvals and reviews.
Can I convert a small bathroom into an accessible space?
Affirmative, through layout adjustments and compact fixtures such as wall-hung sinks.
How high should grab bars be installed?
Position them 33 to 36 inches from the floor for optimal reach.
What flooring is safest for aging-in-place bathrooms?
Textured vinyl, rubber tiles, or satin porcelain offer superior traction.
Can I add a walk-in shower without moving plumbing?
Possible if drains align; a plumber assesses viability.
What lighting works best for older eyes?
Bright, consistent LED sources in warm hues with reduced glare.
Pro Tips for Success
Anticipate evolving requirements by allocating room for aids or assistants. Employ color contrasts on fixtures for better sightlines. Integrate adjustable-height shower options for sitting. Add anti-scald valves for temperature control. Position storage at reachable levels, eschewing high shelves. Collaborate with certified aging-in-place designers for precision and regulatory alignment.
Sustaining Long-Term Benefits
An thoughtfully executed aging-in-place bathroom elevates routine tasks, fortifies security, and appreciates in worth. Diligent care, thorough cleaning, and periodic safety evaluations preserve its efficacy. Selecting durable components and skilled labor yields a versatile, aesthetically pleasing haven that evolves with personal circumstances over decades.