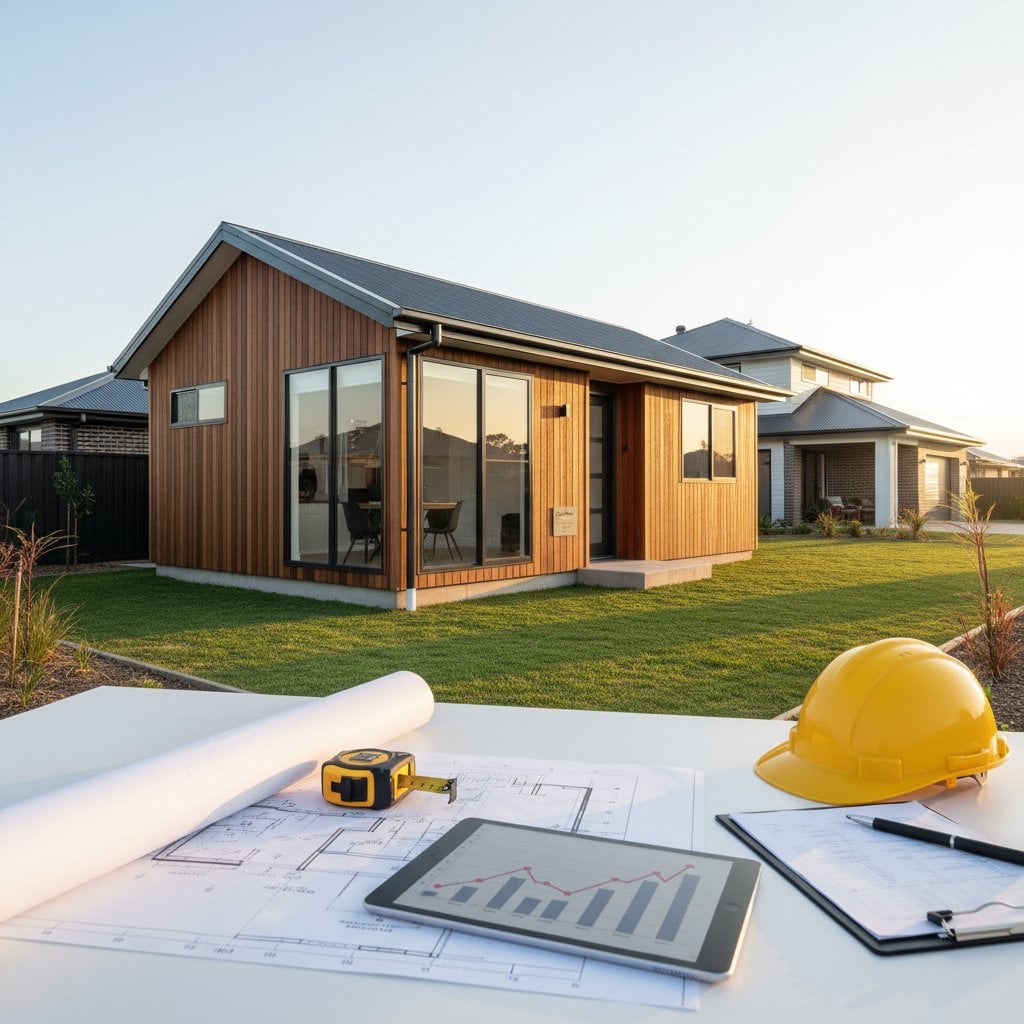
Granny Flat Costs: Unlocking ROI Potential in 2026
Adding a granny flat, or accessory dwelling unit (ADU), enhances property value and provides reliable income streams. This guide details construction costs, factors influencing return on investment (ROI), and strategies for informed decisions aligned with your objectives.
Quick Overview
This resource examines total expenses from initial design through final completion, alongside planning for optimal returns. Readers gain insights into key cost drivers, choices between DIY and professional approaches, and essential steps for high-quality results.
Cost and Time Estimates
A detached granny flat typically requires an investment of $140,000 to $280,000. For attached units or garage conversions, expect $90,000 to $190,000. Variations arise from unit size, material selections, permitting requirements, and site-specific challenges.
Detailed cost breakdown:
- Design and permits: $6,000 to $15,000, covering architectural plans and regulatory approvals.
- Site preparation and foundation: $10,000 to $25,000, including excavation, grading, and concrete work.
- Framing and structural elements: $30,000 to $70,000, encompassing lumber, steel supports, and assembly.
- Plumbing and electrical systems: $15,000 to $35,000, for piping, wiring, and compliance with safety standards.
- Interior finishes: $25,000 to $60,000, such as flooring, cabinetry, and wall treatments.
- Appliances and fixtures: $5,000 to $15,000, including kitchen essentials and bathroom hardware.
- Landscaping and exterior features: $5,000 to $20,000, for pathways, fencing, and aesthetic enhancements.
Project timeline:
- Professional construction: 4 to 8 months, allowing for coordinated scheduling and inspections.
- DIY or hybrid approaches: 6 to 12 months, factoring in learning curves and sequential tasks.
Project complexity: Advanced level. Full residential infrastructure demands adherence to building codes, multiple inspections, and integration of specialized systems.
DIY Versus Professional Approaches
Constructing a granny flat involves coordination across trades, making it a substantial undertaking. While certain elements suit self-management, complete DIY efforts prove feasible only for those with extensive construction experience.
Suitable for DIY execution:
- Interior painting and trim installation, using quality brushes and even coats for professional results.
- Landscaping and exterior detailing, such as planting native species and applying sealants.
- Basic light fixture mounting, completed post-inspection to ensure safety.
Require licensed professionals:
- Foundation pouring and structural framing, to guarantee load-bearing integrity.
- Electrical, plumbing, and HVAC installations, adhering to national and local codes.
- Roofing, insulation application, and drywall finishing, for weatherproofing and fire resistance.
Financial comparison:
- Incorporating DIY elements: Potential labor savings of 10 to 20 percent, though time investments vary.
- Full professional oversight: Elevated initial expenses offset by expedited timelines and assured code passage.
For rental-focused projects, professional involvement yields superior ROI via enhanced durability, safety features, and quicker market readiness.
Step-by-Step Construction Process
1. Plan and Design the Unit
Review local zoning laws and setback distances from property lines. Select the configuration: detached structure, attached addition, or existing space conversion. Develop a functional floor plan incorporating required living areas, including a compact kitchen, full bathroom, bedroom, and ample storage.
Validation point: Confirm the blueprint complies with municipal codes and integrates seamlessly with site constraints.
2. Obtain Permits and Approvals
Prepare and submit detailed construction drawings to the building authority. Secure permits for structural, plumbing, and electrical components. Arrange inspection schedules to align with project phases.
Validation point: Secure documented authorization prior to any ground disturbance.
3. Site Preparation
Remove vegetation, rocks, and debris from the build area. Locate and mark underground utilities to prevent disruptions. Grade the soil for even drainage and compact it to support the foundation.
Utility caution: Contact service providers at least 48 hours before excavation to identify buried lines.
Validation point: Verify the site achieves uniform leveling with no unmarked hazards.
4. Foundation Installation
Erect formwork and position rebar according to engineered specifications. Pour concrete mixture, ensuring consistent depth, and permit 7 to 28 days for curing based on weather conditions. Install anchor bolts and measure slab flatness.
Validation point: Achieve levelness within 1/8 inch tolerance across the entire surface.
5. Structural Framing
Assemble wall frames, install roof trusses, and apply exterior sheathing per approved plans. Incorporate vapor barriers and flashing to mitigate moisture intrusion.
Height safety alert: Employ stable scaffolding and personal fall arrest systems for elevated work.
Validation point: Ensure all elements align squarely, vertically, and with adequate bracing.
6. Utility Rough-Ins
Route electrical conduits, install breakers, and label all circuits clearly. Lay plumbing pipes with appropriate gradients and ventilation stacks. Position HVAC components, such as ductwork or heat pump lines.
Power safety alert: De-energize sources and utilize grounded tools during installations.
Validation point: Pass rough-in inspections before enclosing any systems within walls.
7. Insulation and Drywall Application
Install batt or spray insulation rated R-13 to R-21 in walls, floors, and attics. Caulk seams around penetrations for airtight seals. Fasten drywall sheets, apply joint compound, and sand for seamless joints.
Validation point: Surfaces present smooth, uniform preparation for subsequent finishes.
8. Interior and Exterior Completion
Apply primer and paint in multiple layers, install resilient flooring and cabinetry. Fit trim molding, recessed lighting, and operational fixtures. Clad exteriors with durable siding or stucco, ensuring weather-tight seals.
Validation point: Confirm all elements function reliably with clean, protected surfaces.
9. Final Landscaping and Inspection
Construct access paths, install low-voltage lighting, and integrate drought-tolerant plants. Coordinate the comprehensive final inspection with authorities.
Validation point: Obtain occupancy certification, signaling full compliance and usability.
Essential Safety Measures
Prioritize protocols to mitigate risks throughout construction. Shut down electrical circuits before handling wiring or panels. Secure ladders with spotters and avoid solo rooftop activities. Don respiratory protection during dust-generating tasks like cutting or sanding. Adhere strictly to permitting processes, as deviations may invalidate coverage and diminish asset worth.
Addressing Common Challenges
Frequent issues and solutions:
- Foundation irregularities: Reassess compaction levels and employ laser levels for pours.
- Leakage points: Examine and reinforce flashing at vulnerable junctions.
- Inadequate airflow: Incorporate exhaust fans and soffit vents in moisture-prone zones.
- Circuit overloads: Dedicate breakers to high-draw items like ranges or dryers.
Routine quality verifications:
- Confirm plumb and square alignments in framing.
- Test operable components for effortless function.
- Check drainage systems for clear flow.
- Validate electrical and plumbing operations under load.
Post-Construction Cleanup
Transport concrete remnants and wood waste to designated facilities. Segregate metals, paper products, and cabling for recycling programs. Clear debris thoroughly, extracting fasteners to prevent injuries. Handle paints and chemicals per regional hazardous guidelines.
Thorough site restoration upholds standards and prepares the space for safe habitation.
Ongoing Maintenance Strategies
Quality construction supports a 50-year service life with diligent care.
Scheduled tasks:
- Examine roofing and drainage biannually for wear.
- Refresh exterior coatings every 8 to 10 years.
- Verify detector functionality each month.
- Drain and inspect heaters yearly.
- Apply sealants to openings as erosion appears.
Component lifespans:
- Heaters: 10 to 15 years.
- Climate systems: 12 to 20 years.
- Surfaces: 10 to 25 years by type.
Consistent attention safeguards value and ensures occupant comfort.
Indicators for Professional Intervention
Engage experts for:
- Compromised framing or base stability.
- Complex wiring or pipe repairs.
- Roofing failures or structural sags.
- Soil erosion affecting perimeters.
Associated expenses:
- Frame fixes: $5,000 to $20,000.
- System rewires: $3,000 to $8,000.
- Pipe overhauls: $4,000 to $10,000.
Contractor selection criteria:
- Confirm credentials and coverage.
- Solicit multiple detailed proposals.
- Review client feedback and portfolios.
- Clarify guarantees on labor and products.
Expert input maintains standards and preserves financial returns.
Calculating Return on Investment
Granny flats yield steady revenue through leasing or elevate sale prices. Annual ROI averages 8 to 12 percent for stable tenancies; vacation lets may exceed this with active oversight.
ROI influencers:
- Regional demand and accessibility.
- Build standards and amenity levels.
- Efficiency in energy and insulation.
- Consistent occupancy.
- Fiscal burdens like taxes and premiums.
Monitor utilities, upkeep, and earnings to optimize strategies.
Enhancing Investment Durability
Incorporate sustainable features during planning to amplify benefits.
Recommended enhancements:
- Integrate photovoltaic arrays for bill reductions.
- Specify efficient bulbs and certified appliances.
- Select enduring facades and coverings.
- Fit conservation plumbing and xeriscaping.
Strategies for Optimal Outcomes
Opt for compact, intelligent layouts to control expenses while preserving livability. Archive all documentation for future valuations. Integrate utility spaces and vehicle access upfront. Employ versatile, neutral palettes to broaden appeal.
Strategic execution delivers enduring revenue, adaptability, and asset appreciation, expanding residential or income capacities effectively.


