Remove glossy tiles or vinyl and install alternatives such as rubber mats, cork underlayment, or ceramic tiles with a matte, textured finish. Opt for products certified for wet-area use to ensure durability. Apply adhesive evenly and allow full curing time before regular foot traffic.
Verification Step: Test the surface by walking with dampened shoes. The flooring should offer firm footing without any tendency to slide.
4. Switch to Lever-Style Handles
Traditional round knobs demand precise grip strength, which proves challenging for those with arthritis or reduced dexterity. Levers allow operation with minimal effort, promoting independence.
Identify doors and faucets requiring updates, then select ergonomic lever handles made from durable materials like brushed nickel. Remove old hardware carefully to avoid damaging frames, and install new pieces with provided screws. For faucets, ensure compatibility with existing plumbing to prevent leaks.
Verification Step: Operate each handle using one hand to evaluate ease of use. Movement should occur smoothly without sticking.
5. Expand Doorways and Hallways for Accessibility
Narrow passages hinder mobility aids like wheelchairs, increasing frustration and safety concerns. Wider openings facilitate unobstructed movement throughout the home.
Structural Caution: Alterations to doorways can impact load-bearing elements. Consult a licensed contractor for assessments and executions.
Target a minimum clear width of 32 inches to accommodate standard wheelchairs. For minor adjustments, replace hinges with offset models to gain extra clearance without full reconstruction. Involve professionals for framing changes, ensuring compliance with building codes.
Verification Step: Measure the opening post-installation to verify it meets accessibility standards. Test passage with a mobility device if applicable.
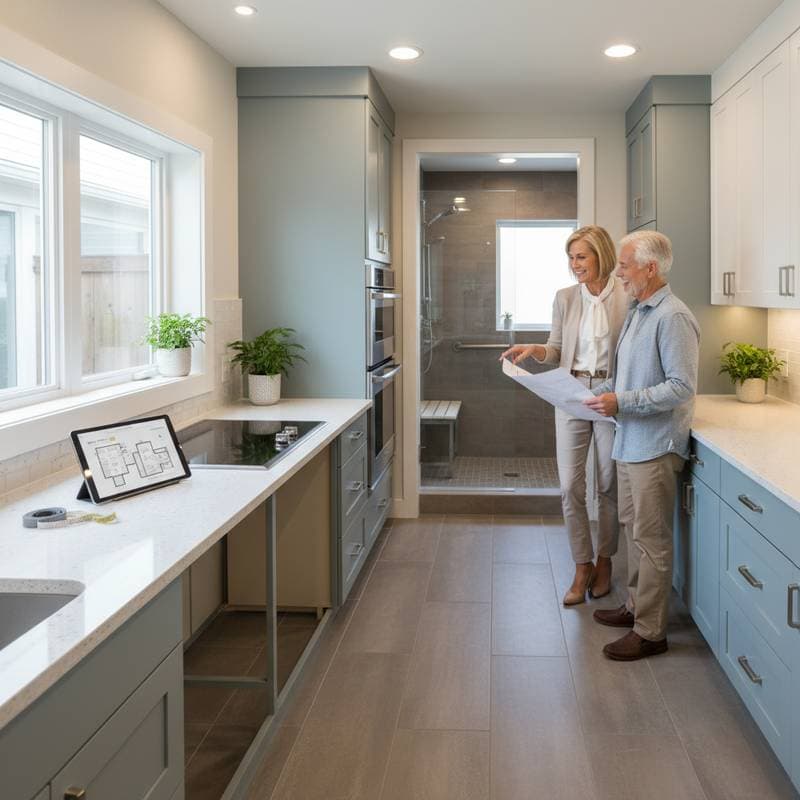
6. Adjust Work Surfaces for Optimal Reach
Standard counter heights suit average statures but exclude seated users or those with varying needs. Customized levels enhance functionality in kitchens and bathrooms.
Determine ideal heights based on user preferences; 34 inches serves wheelchair occupants well. Install pull-out shelves and full-extension drawer slides to bring items within easy grasp. Reinforce supports to handle daily use without sagging.
Verification Step: Simulate seated and standing positions to check access to counters, sinks, and storage. All essentials must remain reachable without strain.
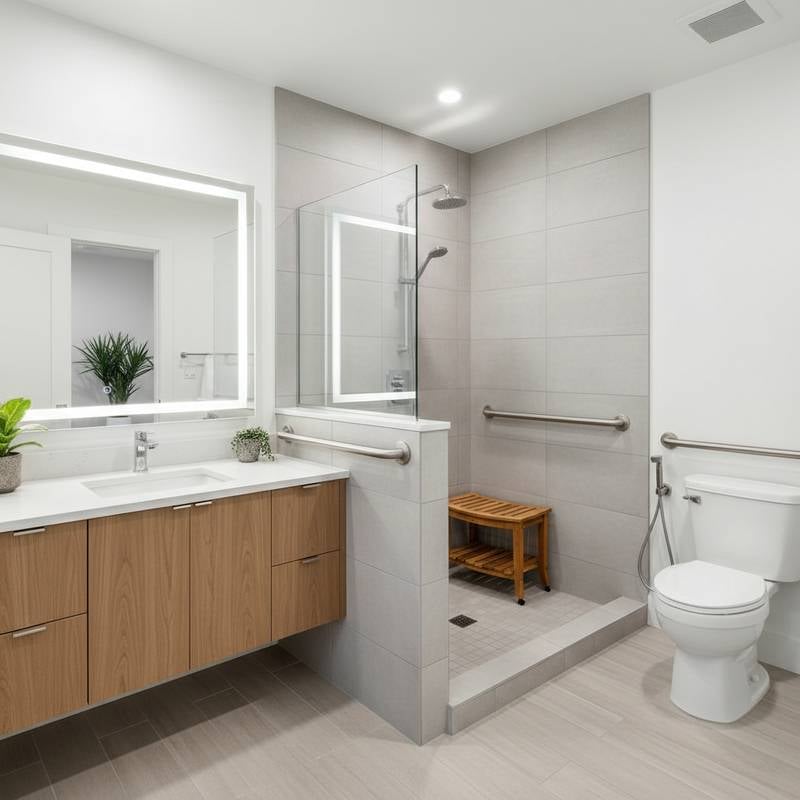
7. Transform Tubs into Walk-In Showers
Conventional tubs present climbing hazards, whereas low-entry showers simplify bathing for limited mobility. This conversion improves hygiene routines and reduces injury potential.
Plumbing Advisory: Modifications affect water lines and drainage. Employ a licensed plumber to manage connections and prevent issues.
Select a shower base with a threshold under two inches, line it with slip-resistant tiles, and add a handheld showerhead mounted on an adjustable bar. Incorporate a fold-down seat and fold-up grab bars for seated options. Seal all joints thoroughly to avoid water damage.
Verification Step: Operate the shower to monitor drainage efficiency and water temperature stability. Address any pooling or fluctuations promptly.
8. Optimize Entryway for Seamless Access
Thresholds and steps at entrances create barriers for wheeled devices or unsteady gait. Ramps and level entries promote confident arrivals and departures.
Construct a ramp with a gentle slope not exceeding 1:12 ratio, surfaced in non-slip material, and flanked by handrails on both sides reaching 34 to 38 inches high. For interior adjustments, install zero-step thresholds compatible with door frames.
Verification Step: Maneuver a wheeled chair or similar item across the entry. Confirm stability and an incline that avoids excessive effort.
Troubleshooting Common Issues
Grab bars that loosen over time indicate insufficient anchoring; reinstall with extended screws penetrating wall studs deeply. If non-slip flooring begins to lift at edges, clean the subfloor, reapply adhesive, and press flat using a heavy roller.
Flickering lights suggest faulty bulbs or wiring problems; replace components first, then summon an electrician for deeper inspections. Leaks around new fixtures require tightening connections and wrapping threads with plumber's tape for a secure seal.
Conduct routine tests on all features. Supports, handles, and ramps must withstand applied weight without shifting. Immediate repairs prevent escalation of minor problems into safety threats.
Guidelines for Professional Assistance
Electrical tasks and plumbing alterations demand certified specialists to adhere to safety regulations. Structural modifications, including doorway expansions or ramp foundations, necessitate general contractors experienced in accessibility projects.
Budget for electrical upgrades at several hundred dollars, covering parts and labor. Bathroom conversions for accessibility often total several thousand dollars, varying with selected finishes and scope. Vet contractors by confirming licenses, insurance coverage, and client references; insist on detailed written proposals separating labor from materials.
Sustaining Accessibility Upgrades
Each modification bolsters daily comfort while elevating property appeal to future buyers. Routine upkeep preserves functionality and averts deterioration.
Inspect your home annually for evolving needs, such as additional lighting or reinforcement. Incremental enhancements foster prolonged independence and security within familiar surroundings.