Understanding Costs for Universal Design Remodeling in 2026
Universal design remodeling transforms homes into spaces that accommodate individuals of all ages and abilities, promoting safety, comfort, and independence. This comprehensive guide details realistic costs, planning processes, and professional considerations to help maintain project momentum and achieve desired outcomes.
Overview of Universal Design Principles
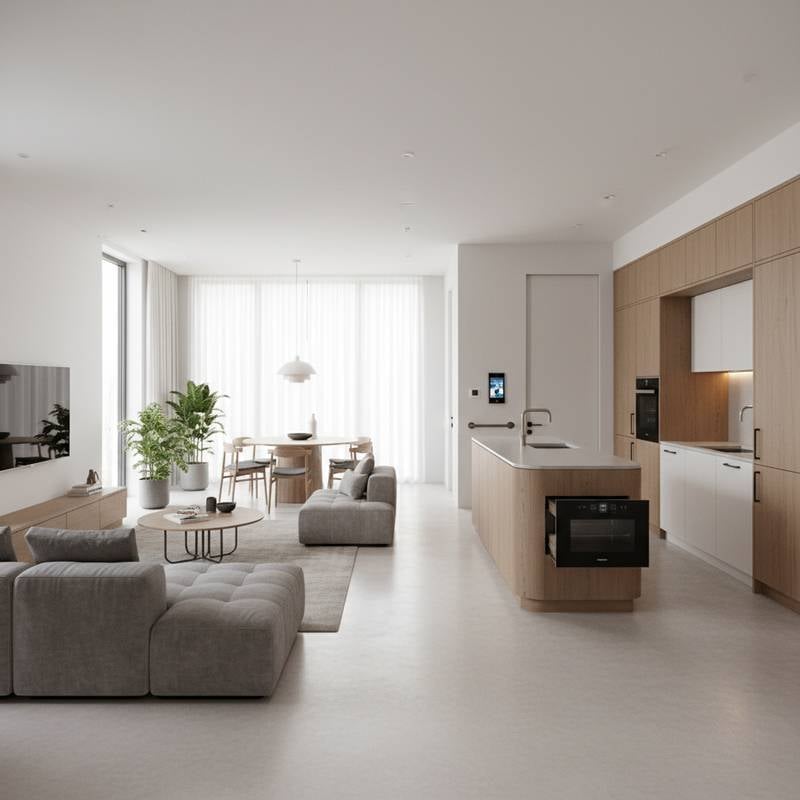
Universal design enhances accessibility and usability without compromising aesthetics, avoiding an institutional appearance. Key elements include wider doorways for wheelchair access, entryways without steps, bathrooms equipped for ease of use, and upgrades to lighting and hardware that support daily activities. These modifications foster long-term residency and adaptability to changing needs.
Detailed Cost and Timeline Breakdown
Costs for universal design projects span a broad spectrum based on project scale. Basic enhancements, such as installing lever handles, grab bars, and improved lighting, typically range from $3,000 to $8,000. Moderate renovations involving a single bathroom or kitchen update fall between $25,000 and $60,000. Comprehensive whole-home overhauls, particularly those requiring structural alterations or additions, often exceed $100,000 and can reach $250,000.
Factors influencing expenses include the project's scope, whether it targets one room or the entire residence; material selections like durable, accessible tiles, cabinetry, and fixtures; regional labor rates and contractor expertise; necessary permits and inspections for plumbing, electrical, or structural modifications; and fees for designs by certified universal design specialists.
Timelines vary accordingly. Minor adjustments require one to two weeks. Bathroom or kitchen renovations demand four to eight weeks. Extensive home-wide projects extend to three to six months.
Projects carry a moderate to advanced difficulty level, as many features necessitate skilled construction, plumbing, or electrical interventions best executed by licensed experts.
Deciding Between DIY and Professional Services
Certain universal design improvements suit DIY efforts, provided they align with safety standards and local regulations. Others demand expert input to ensure compliance and functionality.
Suitable DIY projects encompass:
- Fitting lever-style door handles for easier operation.
- Incorporating motion-sensor or smart lighting systems.
- Securing grab bars with appropriate wall anchors.
- Adjusting closet rods and shelves to lower heights.
Professional involvement proves essential for:
- Creating roll-in showers or eliminating entry curbs.
- Widening doorways through structural adjustments.
- Handling electrical upgrades for outlets and lighting.
- Modifying plumbing for accessible sinks and toilets.
- Installing ramps or mobility lifts.
Comparative costs highlight the differences. DIY for minor updates ranges from $500 to $2,000. Professional partial remodels cost $15,000 to $40,000. Full professional remodels start at $100,000.
Engaging licensed contractors guarantees adherence to safety codes, including precise specifications for slopes, handrail positions, and waterproofing measures.
Planning Your Universal Design Remodel: Step-by-Step Guide
Step 1: Assess Existing Conditions
Conduct a thorough walkthrough of your home to pinpoint accessibility challenges. Note narrow hallways, elevated thresholds, or inadequate lighting. Evaluate bathroom configurations for sufficient maneuvering room. Measure doorways and surrounding spaces to accommodate potential mobility devices.
Success indicator: Compile a detailed inventory of barriers impeding accessibility.
Step 2: Establish Objectives and Priorities
Determine the remodel's extent, from a single room to full-home integration. Prioritize high-impact zones like entrances and bathrooms. Account for present requirements and anticipate future mobility demands.
Success indicator: Develop a prioritized list of essential features and goals.
Step 3: Develop a Comprehensive Budget
Obtain quotes for materials, labor, and permitting fees. Allocate 10 to 15 percent as a contingency for unforeseen issues. Request itemized breakdowns from contractors to facilitate accurate comparisons.
Success indicator: Formulate a budget that encompasses all anticipated expenses plus a reserve.
Step 4: Select a Certified Specialist
Identify remodelers with expertise in accessibility protocols. Confirm their licensing, insurance coverage, and client references. Inquire about prior involvement in aging-in-place initiatives.
Success indicator: Receive a comprehensive proposal from a vetted professional.
Step 5: Obtain Permits and Arrange Inspections
Consult your local building authority for requirements. Secure approvals for structural, electrical, and plumbing alterations. Plan inspections to verify regulatory compliance.
Success indicator: Gain pre-approval for all permits and inspection schedules prior to commencement.
Step 6: Execute Demolition and Preparation
Dismantle outdated fixtures, flooring, and partitions as required.
Warning: Hazards from dust and debris exist.
- Equip yourself with eye protection, gloves, and a respirator.
- Isolate work zones to contain dust dispersion.
Success indicator: Prepare the area securely for subsequent installations.
Step 7: Implement Structural and Systems Upgrades
Address framing, plumbing, and electrical components in this phase.
Caution: Risks associated with electrical and plumbing systems.
- Disconnect primary power and water supplies beforehand.
- Restrict connections to licensed tradespeople.
Success indicator: Achieve passing results on rough-in inspections before proceeding to finishes.
Step 8: Integrate Fixtures and Surface Treatments
Position flooring, cabinetry, and user-friendly fixtures. Select slip-resistant flooring materials. Opt for color contrasts that enhance visibility. Anchor grab bars into structural supports rather than surface drywall.
Success indicator: Confirm that all elements are firmly installed, aligned, and conveniently accessible.
Step 9: Verify Functionality and Make Adjustments
Test door operations, illumination intensity, and control mechanisms for water temperature. Ensure doors swing freely with adequate turning space. Fine-tune lighting to minimize glare and shadows.
Success indicator: Validate seamless operation free of obstacles or risks.
Essential Safety Measures
Warning: Electrical dangers require powering down before any wiring or fixture installation.
Caution: Heights pose fall risks; employ stable ladders and footwear with traction.
Protective equipment includes gloves, goggles, and masks for demolition or surface preparation activities.
Adhere to ADA standards for grab bar elevations, ramp inclines, and passage widths.
Maintain unobstructed pathways throughout construction to avoid incidents.
Addressing Common Issues and Performing Checks
Typical challenges and resolutions:
- Sticking doors: Realign hinges and verify clearances.
- Loose grab bars: Upgrade to toggle anchors or blocking-supported fasteners.
- Excessive lighting glare: Install diffused or indirect bulb options.
- Poor shower drainage: Confirm a one-quarter-inch-per-foot slope directing to the drain.
Quality verification points:
- Ensure doors and pathways measure at least 36 inches in width.
- Position light switches between 36 and 48 inches from the floor.
- Secure flat, stable transitions in flooring.
- Design hardware for single-handed, low-effort use.
Post-Installation Cleanup and Waste Management
Clear away debris and discarded components following completion. Segregate recyclables such as metals, tiles, and wood where feasible. Handle adhesives, paints, and chemicals per local hazardous waste guidelines. Thoroughly vacuum and clean surfaces to eliminate dust and residues.
A pristine environment simplifies final evaluations and enhances indoor air quality upon reoccupation.
Ongoing Maintenance for Durability
Universal design elements endure with routine care, prolonging their effectiveness.
- Inspect grab bars for stability semiannually.
- Maintain uniform color temperatures when replacing lighting bulbs.
- Clean non-slip surfaces using gentle detergents to preserve traction.
- Examine plumbing seals and caulking annually to avert leaks.
High-quality fixtures typically serve 10 to 20 years. Initiate replacements promptly if deterioration compromises safety or performance.
Indicators for Professional Intervention
Engage experts for tasks involving:
- Rewiring electrical systems or upgrading panels.
- Relocating plumbing lines.
- Altering load-bearing structures.
- Applying waterproofing to barrier-free showers.
- Fitting elevators or stair lifts.
Standard professional pricing:
- Bathroom renovations: $25,000 to $45,000.
- Kitchen overhauls: $35,000 to $70,000.
- Ramp or lift setups: $5,000 to $20,000.
- Complete home adaptations: $100,000 to $250,000.
Contractor evaluation criteria:
- Active license and insurance.
- Formal agreement detailing timelines and payments.
- Proven track record in accessibility work.
- Comprehensive warranties for labor and materials.
- Favorable endorsements from past clients.
Collaboration with skilled professionals secures safety, regulatory adherence, and dependable results.
Strategies for Optimal Results
- Initiate planning with a specialist consultation, even for staged implementations.
- Select enduring, neutral finishes and robust materials to maintain a welcoming ambiance.
- Incorporate smart technologies like automated lighting, climate controls, and sensors for enhanced usability.
- Address diverse needs beyond physical mobility, including visual, auditory, and cognitive aspects.
- Simulate layouts with tape markers to assess reach and navigation prior to commitment.
These approaches yield homes that integrate naturally while prioritizing security.
Enduring Advantages of Universal Design
Beyond accessibility, universal design elevates property worth, lowers upkeep expenses, and sustains autonomy amid evolving circumstances. Thoughtfully executed adaptations accommodate life's phases without extensive revisions.
Quality investments in materials, expert guidance, and precise execution cultivate environments that embrace loved ones and anticipate tomorrow's demands. Universal design represents a commitment to sustained well-being and respect.
Frequently Asked Questions
What defines universal design?
Universal design develops environments usable by everyone, irrespective of age or ability, without requiring modifications.
How does universal design differ from ADA compliance?
ADA guidelines govern public facilities, whereas universal design emphasizes residential adaptability and user comfort.
Are permits necessary for universal design projects?
Most structural, electrical, and plumbing alterations mandate permits; verify with your local authority.
Can accessibility be added to an existing bathroom without total renovation?
Affordable options include installing grab bars, elevating the toilet, and adding a handheld showerhead.
Does the investment in universal design justify the expense?
It enhances safety, daily convenience, and enduring habitability, potentially offsetting future healthcare or moving costs.
How to identify a suitable contractor?
Seek certifications in aging-in-place or universal design, along with verifiable references and insurance.
Which materials excel in accessible bathrooms for longevity?
Porcelain tiles, solid-surface countertops, and stainless steel grab bars provide superior resilience and minimal maintenance.
Grasping the financial and logistical aspects of universal design remodeling empowers informed decisions that elevate living standards and asset value.


