Prefab ADUs Cost $100K Less Than Traditional Builds
Accessory dwelling units, or ADUs, provide versatile backyard living spaces for guests, family members, or rental income. Prefabricated ADUs offer a faster, more affordable alternative to traditional construction. These factory-built structures arrive ready for assembly, reducing on-site labor and material waste.
In 2025, prefab ADUs typically range from $150,000 to $250,000, while traditional builds cost $250,000 to $400,000 or more. This difference stems from streamlined manufacturing processes and shorter installation timelines. Homeowners save not only money but also time, often completing projects in weeks rather than months.
Key factors influencing prefab ADU pricing include size, design complexity, and location-specific requirements. Foundation work, utility connections, and permitting add to the total, yet remain lower than site-built options. Understanding these elements helps in budgeting effectively for a backyard addition that enhances property value.
What Drives Prefab ADU Costs
Prefab ADUs include several core components that contribute to their overall expense. These elements ensure durability and compliance with building standards.
- Foundation and utility connections.
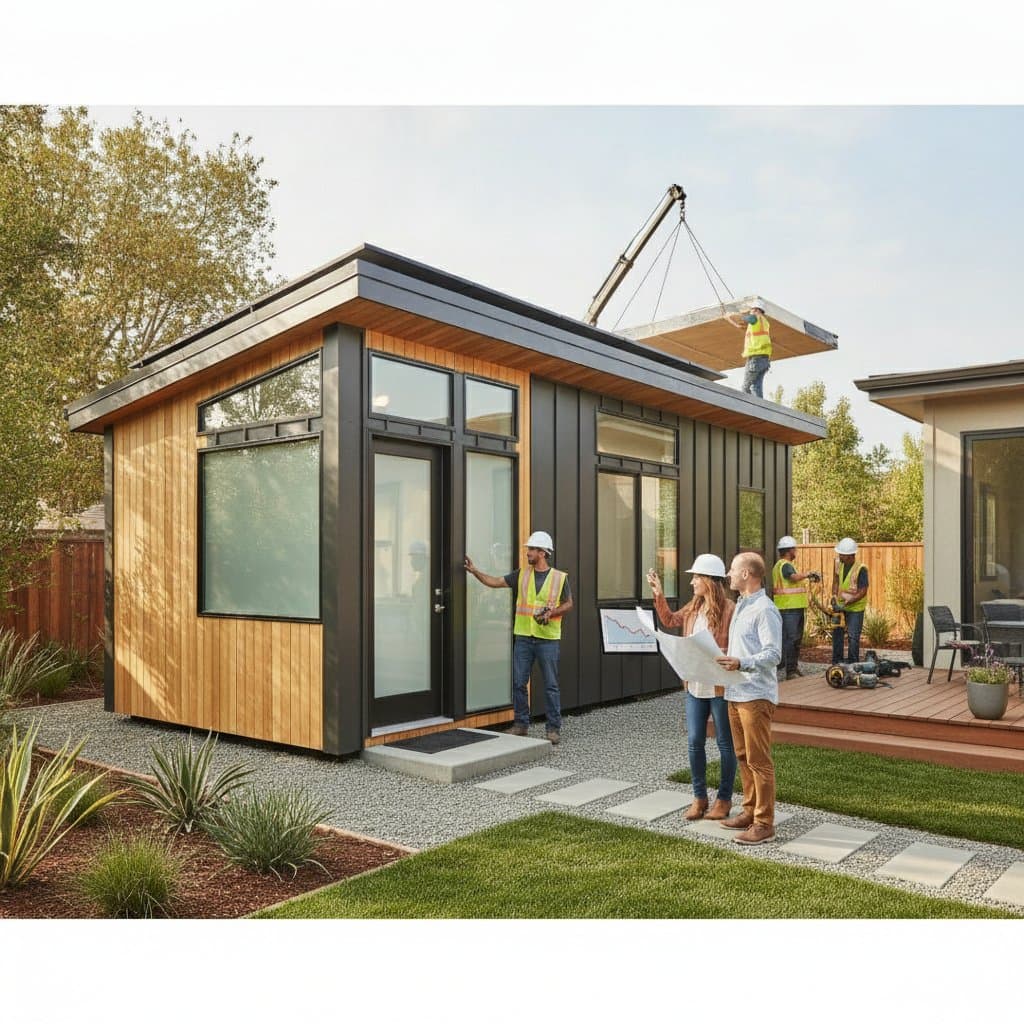
- Crane or set installation of modules.
- Electrical, plumbing, and HVAC hookups.
- Permit submissions and code compliance.
Cost Comparison
Opting for DIY elements in the project can lower expenses significantly. Homeowners who handle site preparation and interior finishes themselves save between $5,000 and $10,000. This approach suits those with construction experience and ample time.
A full professional build provides comprehensive service from design to completion. Expect costs of $180,000 to $250,000, covering permits, delivery, setup, and final inspections. Professional involvement guarantees quality and adherence to local regulations.
Step-by-Step Installation Process
Installing a prefab ADU requires careful planning to avoid setbacks. Follow these steps to ensure a smooth process from start to finish.
-
Assess your property.
Evaluate zoning regulations, setbacks, and lot suitability for an ADU. Confirm that local laws permit such structures on your site.
Success check: The site complies with code and offers sufficient space. -
Select your prefab design.
Review available floor plans and customization options to align with your budget and spatial needs.
Success check: The design fits site dimensions and existing utility access. -
Obtain permits.
Prepare and submit site plans, structural engineering drawings, and utility schematics to the building department.
Success check: Permits receive approval prior to unit ordering. -
Prepare the site.
Remove obstacles, grade the ground evenly, and install the foundation slab or piers.
Caution: Engage a licensed contractor for concrete pouring to meet structural standards.
Success check: The foundation achieves levelness and passes initial inspection. -
Install utilities.
Extend electrical wiring, water supply, and drainage lines from the primary residence to the ADU location.
Warning: Electrical Hazard. Disconnect power at the main panel before handling any wiring.
Success check: Connections undergo pressure testing and gain inspector approval. -
Deliver and set the prefab modules.
Modules transport via flatbed truck and position using a crane for precise placement.
Caution: Maintain a 20-foot clearance zone around the crane for safety.
Success check: Modules secure firmly to the foundation with proper alignment. -
Finish interior and exterior connections.
Apply sealants to joints, integrate utilities, and add finishing touches like siding, trim, and roofing materials.
Success check: The structure resists weather and all systems operate correctly. -
Final inspection.
Arrange for the building department to review the completed installation.
Success check: The inspector approves the work and issues a certificate of occupancy.
Safety Warnings and Tips
Prioritize safety throughout the installation to prevent accidents. Proper precautions protect workers and bystanders alike.
- Wear protective gear, including gloves, safety glasses, and hard hats, near heavy equipment.
- Verify grounding on all electrical circuits prior to appliance connections.
- Operate lifting machinery only after completing certified training.
- Restrict access to the construction area, keeping children and pets at a safe distance.
Troubleshooting and Quality Checks
Issues may arise during or after installation, but prompt attention resolves them efficiently.
Common Issues
- Uneven settling: Inspect the foundation level and reinforce support piers as necessary.
- Moisture intrusion: Apply sealants to joints and flashing to block water entry.
- Utility malfunctions: Examine connection points and test circuit breakers or valves.
Quality Checks
Conduct thorough verifications to confirm structural integrity.
- Ensure floors and walls remain level and plumb.
- Test doors and windows for smooth operation.
- Inspect siding and trim for absence of gaps.
Cleanup and Disposal
After installation, restore the site to its original condition. Proper disposal minimizes environmental impact.
Remove excess concrete, packaging materials, and wood scraps from the area. Prefab suppliers often incorporate recyclable components, so sort metals and cardboard for community recycling programs. Transport soil or debris to designated facilities, then perform final site cleaning before adding landscaping or grading.
Maintenance and Lifespan
With regular care, prefab ADUs endure for 40 to 50 years. Annual roof inspections detect potential leaks early, while gutter cleaning prevents water buildup.
Replace HVAC filters quarterly to maintain efficiency. Refresh exterior paint every seven to ten years, and trim nearby vegetation to keep at least 12 inches from the siding. These practices safeguard against moisture and extend the unit's service life.
When to Call a Professional
Certain problems demand expert intervention to avoid escalation. Seek licensed help for significant concerns.
Hire a contractor when facing foundation cracks exceeding one inch, persistent electrical issues, internal water leaks, or noticeable structural shifts.
Professional Cost Ranges
- Structural repair: $3,000 to $10,000
- Electrical troubleshooting: $500 to $2,000
- Roof or siding repair: $2,000 to $6,000
Checklist for Choosing a Contractor
Select reliable professionals through diligent vetting.
- Confirm valid state licensing and local business registration.
- Request evidence of liability insurance and workers' compensation coverage.
- Secure a written warranty covering materials and workmanship.
- Obtain at least three references from past clients.
- Review the contract for clear milestones and payment schedules.
Pro Tips for Success
Integrate utility planning from the outset to prevent project delays. Select finishes that complement your home's aesthetic for improved market appeal.
Examine manufacturer warranties closely to identify coverage for structural elements and appliances. Time inspections to sustain momentum throughout the build. Prefab ADUs yield durable, compliant spaces that boost property worth when executed with precision and professional guidance.
Thoughtful execution transforms your backyard into a valuable extension of your home, delivering both immediate utility and lasting benefits.