Why Mass Timber Outperforms Traditional Stick Framing in 2026
Quick Overview
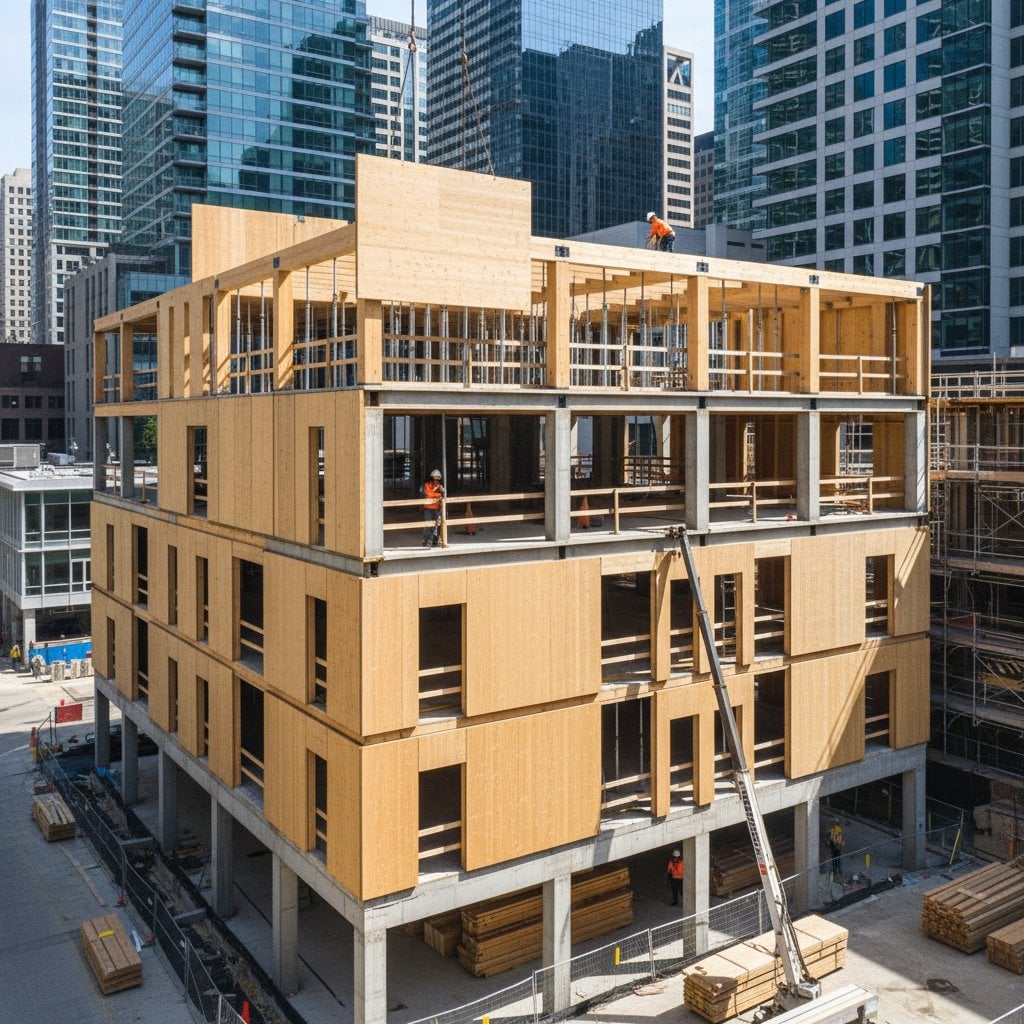
Mass timber construction employs large-scale, engineered wood elements such as panels and beams to create a building's primary framework. This method proves ideal for mid-rise residential developments and commercial structures. Engage a licensed contractor for the design and assembly phases. Project expenses typically fall in the moderate to high range, influenced by project scale and regional material availability. Compared to traditional framing, mass timber shortens construction durations significantly. Primary concerns include fire resistance, moisture management, and precise structural engineering.
Step-by-Step Guide to Mass Timber Installation
1. Examine Engineered Blueprints
Secure structural drawings stamped by a licensed engineer experienced in mass timber applications. Scrutinize load paths, panel configurations, and attachment specifications.
Success indicator: Drawings clearly depict dimensions, fire resistance ratings, and connector types.
2. Site Preparation and Foundation Setup
Mass timber demands exact alignment for stability. Ensure the foundation remains level to within 3 millimeters over its full extent. Remove all debris and verify positions for anchor points.
Success indicator: Anchor bolts align precisely with panel connection locations in the blueprints.
3. Safeguard Materials Against Moisture
Position cross-laminated timber (CLT) and glued-laminated (glulam) components on level surfaces elevated above ground level. Protect them with breathable waterproof coverings to permit air flow.
Caution: Exposure to moisture risks warping or delamination, which compromises structural strength.
Success indicator: Panels maintain dryness and flatness prior to assembly.
4. Position Initial Floor Panels
Employ a crane or telehandler to lift panels into place following layout markings. Secure each panel using specified structural screws or bolts.
Success indicator: Joints form tight seals and conform to the intended grid alignment.
5. Erect Vertical Components
Align columns or wall panels vertically with a laser level. Fasten them using designated steel connectors.
Caution: Heights present fall risks; implement fall arrest systems and lifting guides for large panels.
Success indicator: Vertical elements stand plumb without gaps at joints.
6. Assemble Upper Levels and Roof Structure
Replicate the lifting and securing sequence for higher floors. Seal all seams with appropriate materials to prevent water infiltration.
Success indicator: Seams receive complete sealing, rendering the building envelope impervious to water.
7. Implement Fire and Moisture Defenses
Apply code-mandated fire-retardant coatings or gypsum board layers. Install flashing and vapor barriers at all penetrations.
Success indicator: Exposed wood surfaces achieve the stipulated fire resistance levels.
8. Conduct Inspections and Obtain Certification
Arrange for review by local building officials. Submit records of fire performance tests, connector details, and material certifications.
Success indicator: Authorities approve the framing and enclosure phases.
Essential Quality Assessments and Remedies
Frequent Challenges:
- Panel Distortion: Improper storage or moisture contact often causes this issue. Allow gradual drying and replace persistently deformed units.
- Insecure Fasteners: Verify bolt torque against engineering guidelines and adjust as required.
- Moisture Discoloration: Clean affected areas with suitable wood treatments and examine barriers for breaches; reseal promptly.
On-Site Corrections:
Surface fissures in CLT panels occur routinely. Fill them with approved sealants to block moisture entry.
Scenarios Requiring Professional Expertise
Consult a licensed contractor or engineer when:
- The building surpasses two stories in height.
- Alterations to load-bearing panels become necessary.
- Documentation for fire safety or codes lacks clarity.
- Integration of mechanical, electrical, or plumbing systems pierces structural elements.
Cost Breakdown:
- Materials: Between $25 and $40 per square foot for CLT and associated connectors.
- Labor: Ranging from $15 to $30 per square foot, based on workforce proficiency.
- Equipment Hire: Approximately $500 to $1,000 daily for hoisting apparatus.
Professionals guarantee adherence to codes and minimize expensive corrections.
Selecting a Reliable Contractor:
Request evidence of prior mass timber undertakings, client testimonials, and coverage documentation. Confirm adherence to manufacturer protocols for handling and securing components.
Strategies for Optimal Results
- Procure factory-precut panels to minimize on-site labor and material waste.
- Maintain comprehensive records of moisture levels throughout the build process.
- Engage fire and building authorities early to preempt modification needs.
- Deploy interim roofing or protective films ahead of anticipated precipitation.
- Mark panels clearly by elevation and direction upon arrival.
Mass timber presents a reduced-weight, enhanced-strength, and environmentally responsible option compared to stick framing. Proper engineering and execution deliver rapid assembly, accurate construction, and long-term resilience. Through diligent preparation, projects attain compliance with safety norms while incorporating inviting, organic finishes designed for endurance.


